Find a plumber near you

We're Available 24/7! (360) 610-7901

Author: kristinia

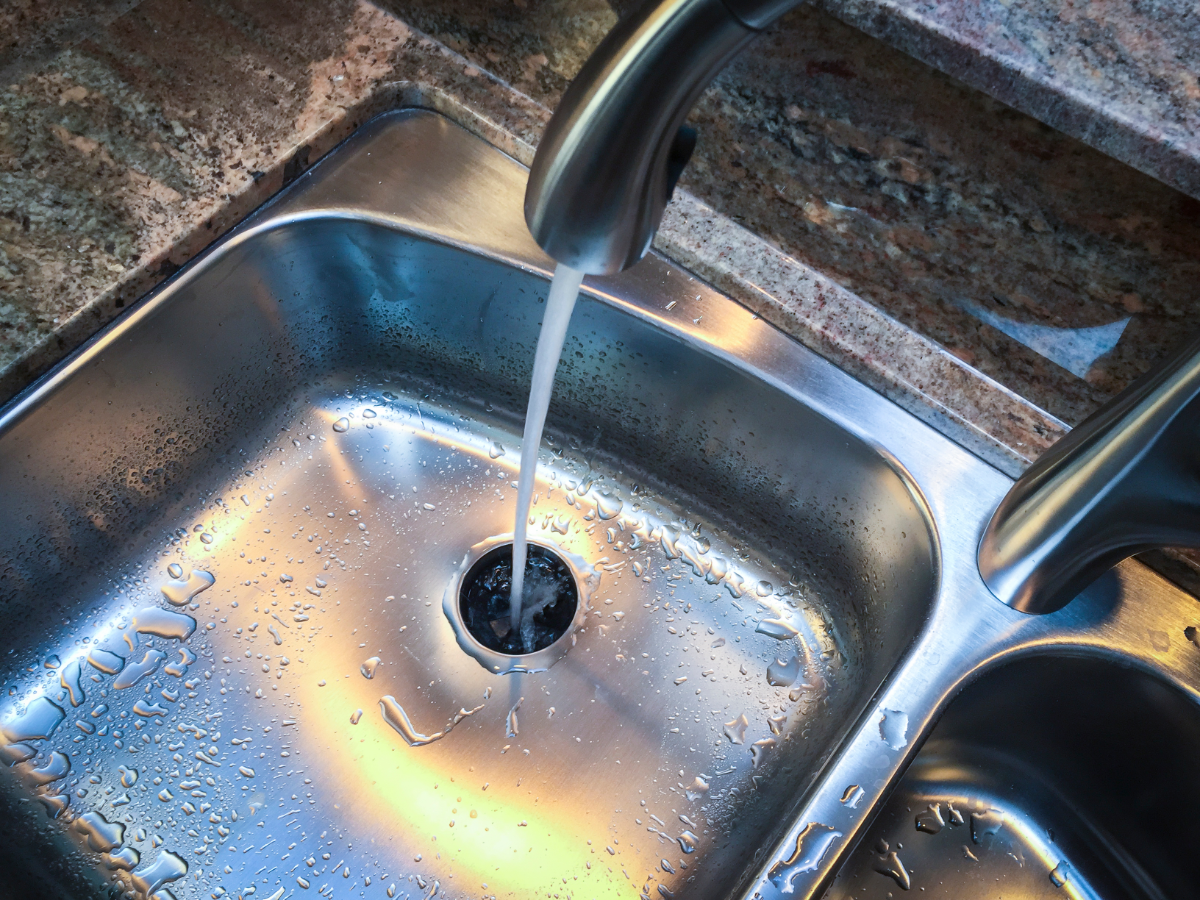
Low Water Pressure in Bathroom Sink: Causes & Fixes

At Full Speed Plumbing, we understand that dealing with low water pressure in a bathroom sink can be a nuisance. It’s a common problem that can turn routine tasks like brushing your teeth into time-consuming chores. That’s why our team of plumbing experts has put together this comprehensive guide. 

We’ll delve into the common causes of low water pressure in bathroom sinks and provide expert solutions to fix them. By the end of this guide, you’ll better understand what might be causing your water woes and how to get your plumbing system back up to full speed.

Causes of Low Water Pressure in Bathroom Sinks

Several issues can influence the water pressure in your bathroom sink. Some of the most common examples include the following:

Cause #1: Leak-Related Issues

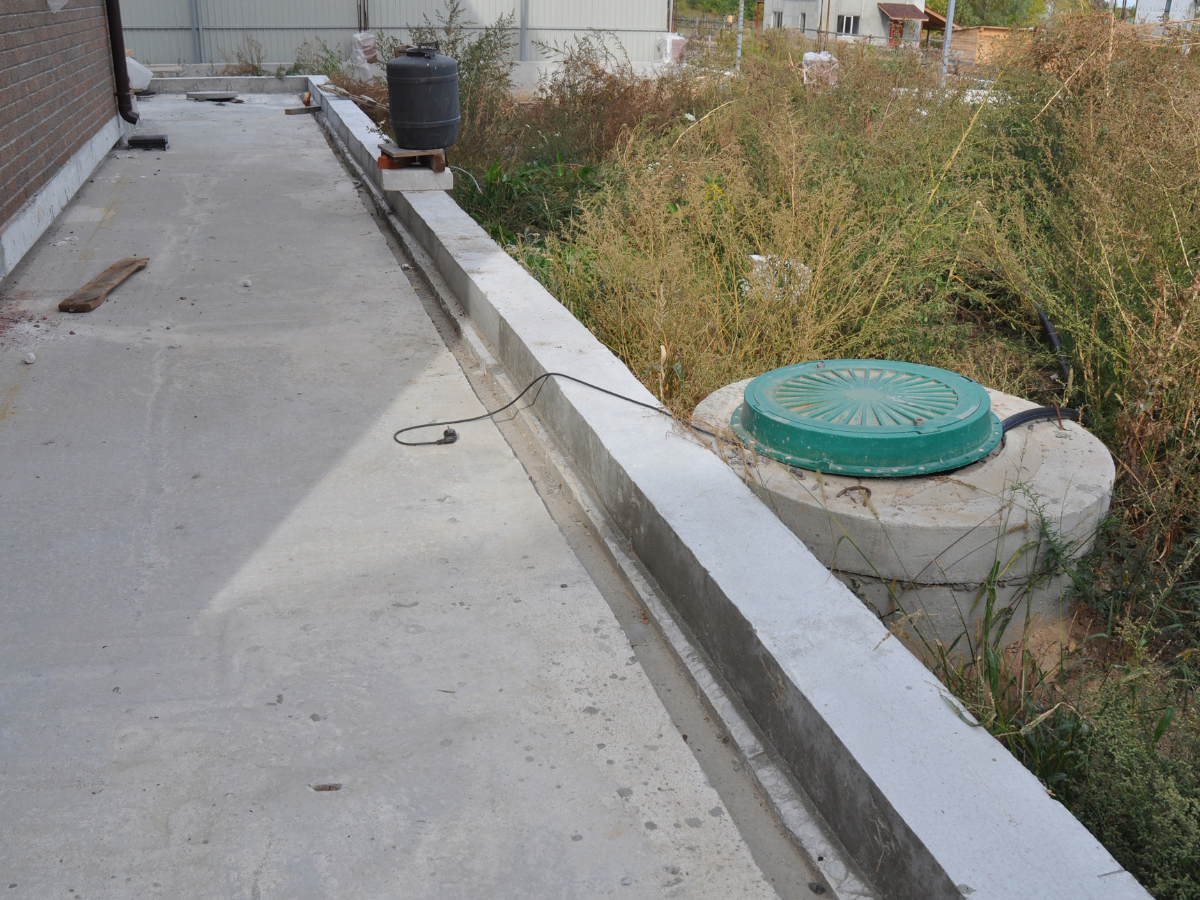
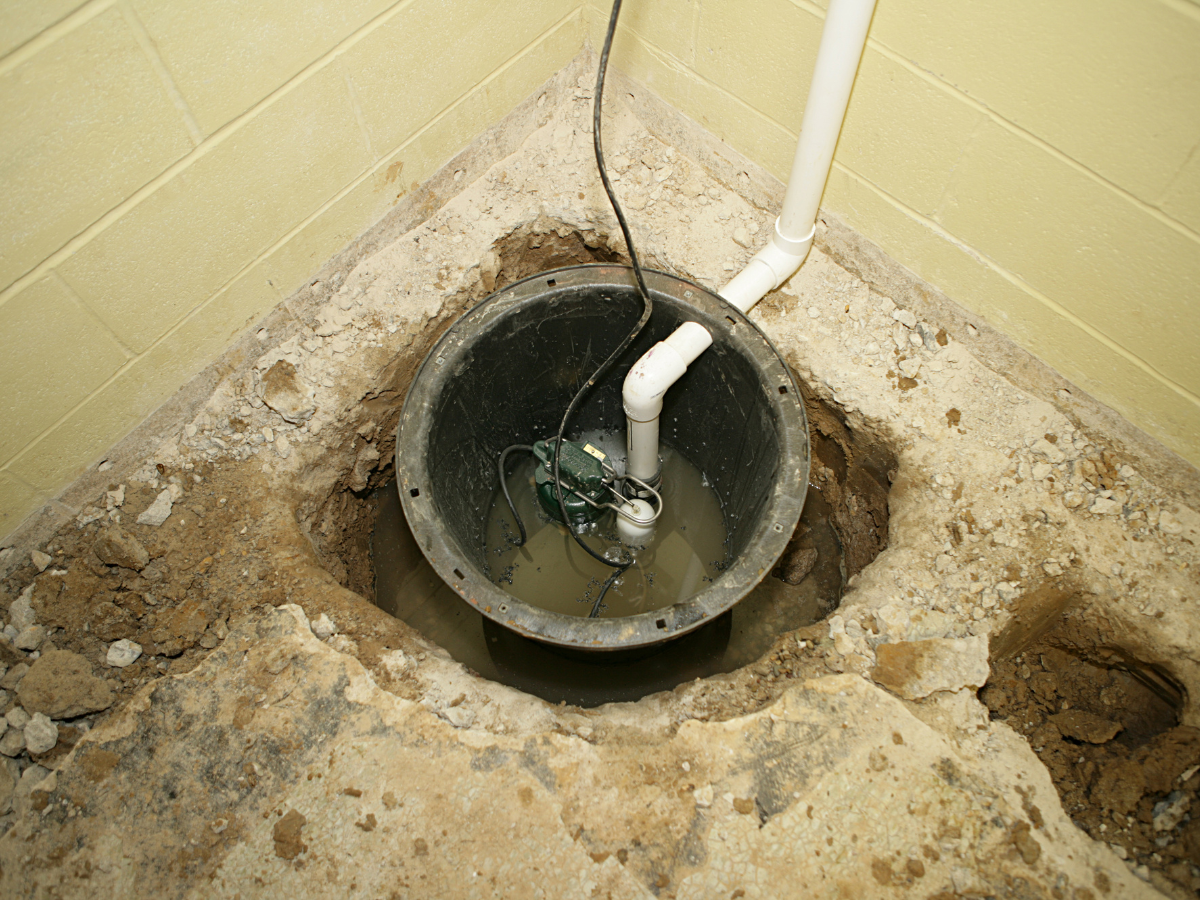
Leaks are often the blame for low water pressure in bathroom sinks. A leak in your home’s plumbing system can reduce the pressure in your sink by diverting the water flow. Check for signs of water damage, such as damp spots on walls, ceilings, or floors, and get any leaks repaired promptly.

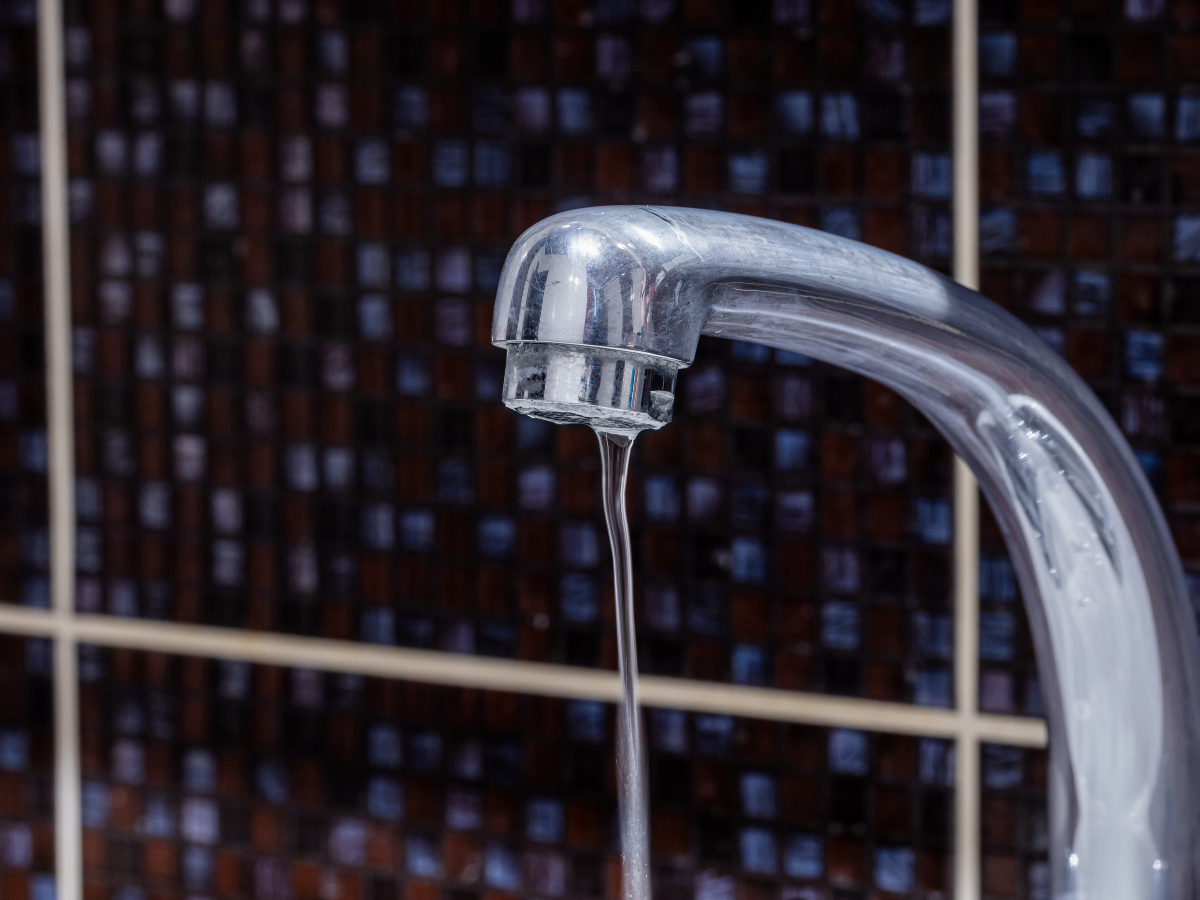
Cause #2: Plumbing Fixture Issues

Another possible cause could be issues with the plumbing fixtures themselves. Over time, faucets can accumulate mineral deposits, particularly in homes with hard water. This build-up can constrict water flow, resulting in reduced water pressure. Regular cleaning or replacing old faucets can resolve this issue.

Cause #3: Household Water Pressure Issues

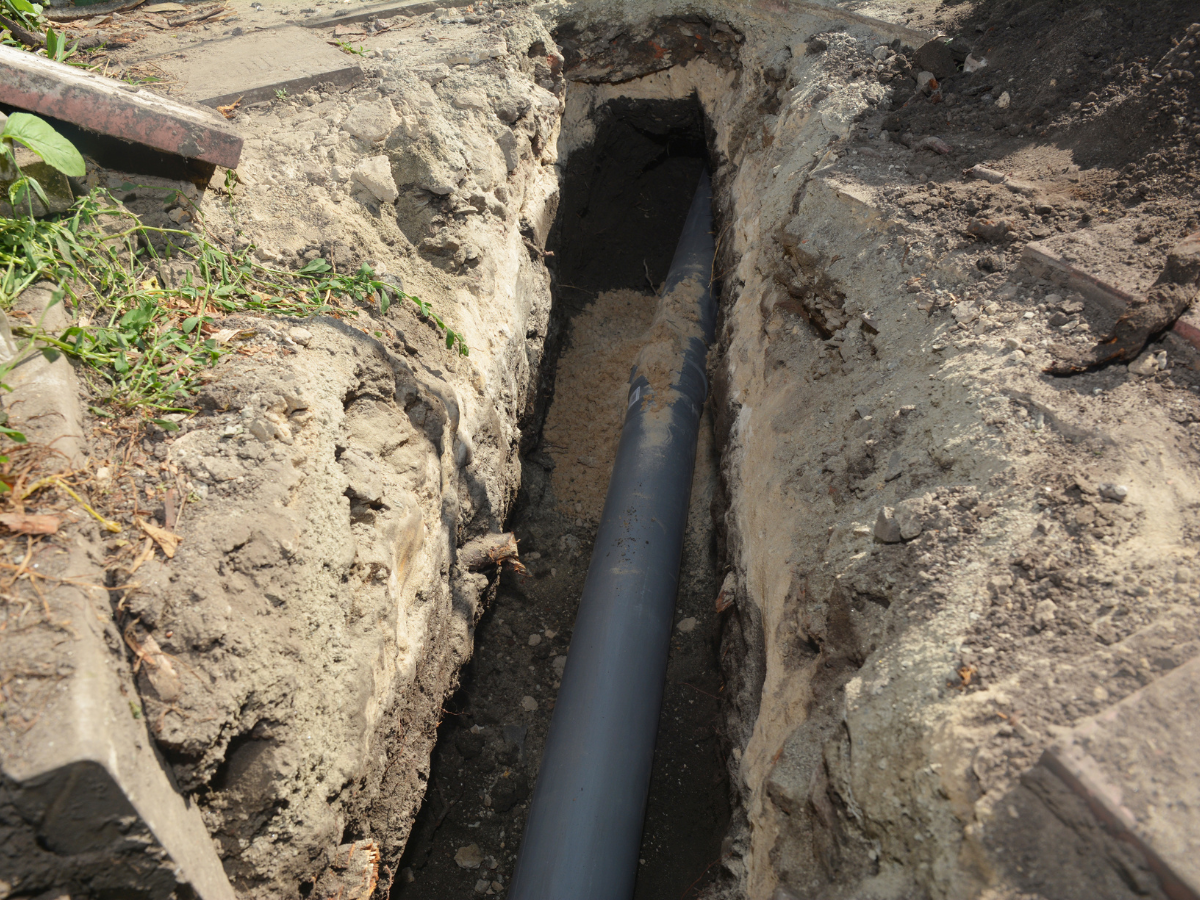
Sometimes, the problem isn’t limited to your bathroom sink. If you’re experiencing low water pressure throughout your home, it could be due to an issue with the water supply. Common culprits include faulty pressure regulators, closed water valves, or even problems with the municipal water supply.

DIY Vs. Calling a Plumbing Technician: Which Option Should You Choose?

When it comes to dealing with low water pressure in your bathroom sink, your course of action largely depends on the root of the problem.

DIY Fixes for Low Water Pressure

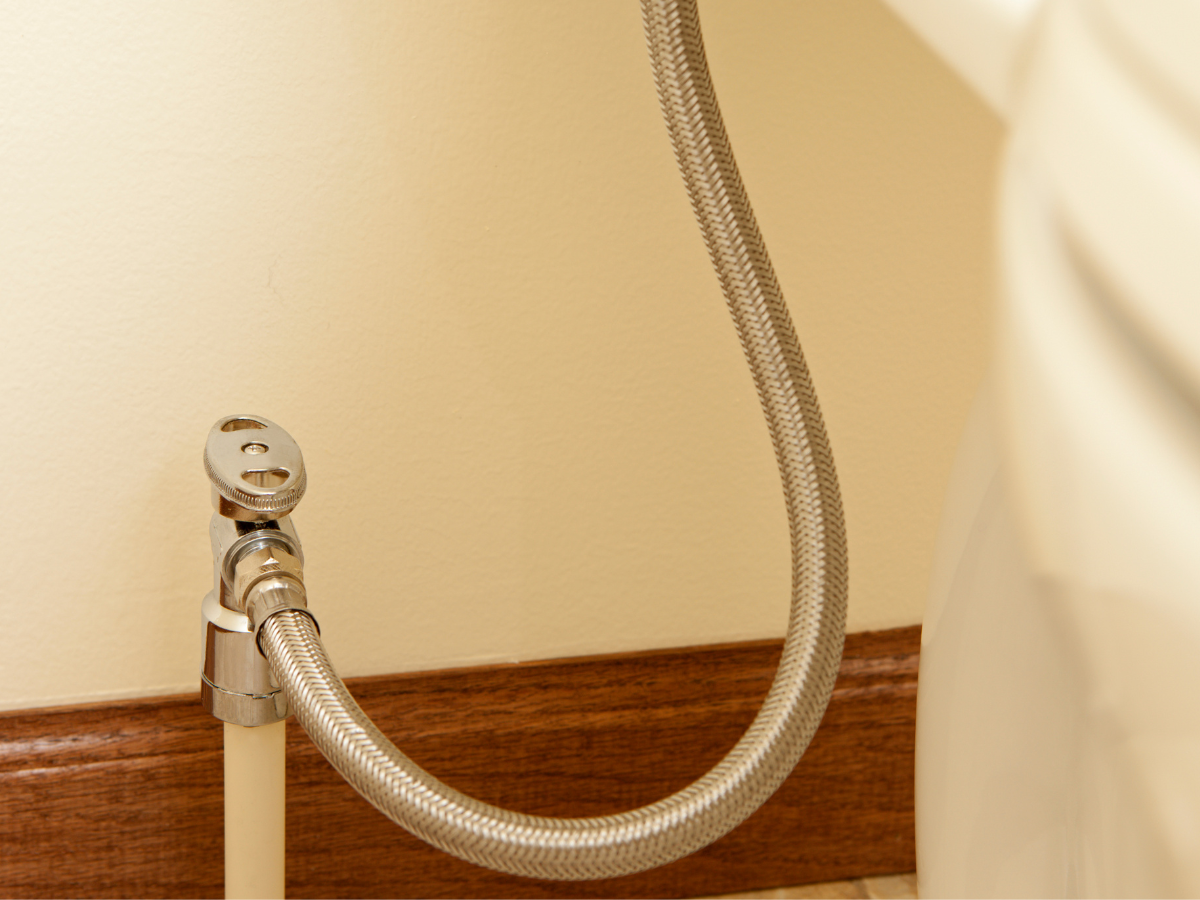
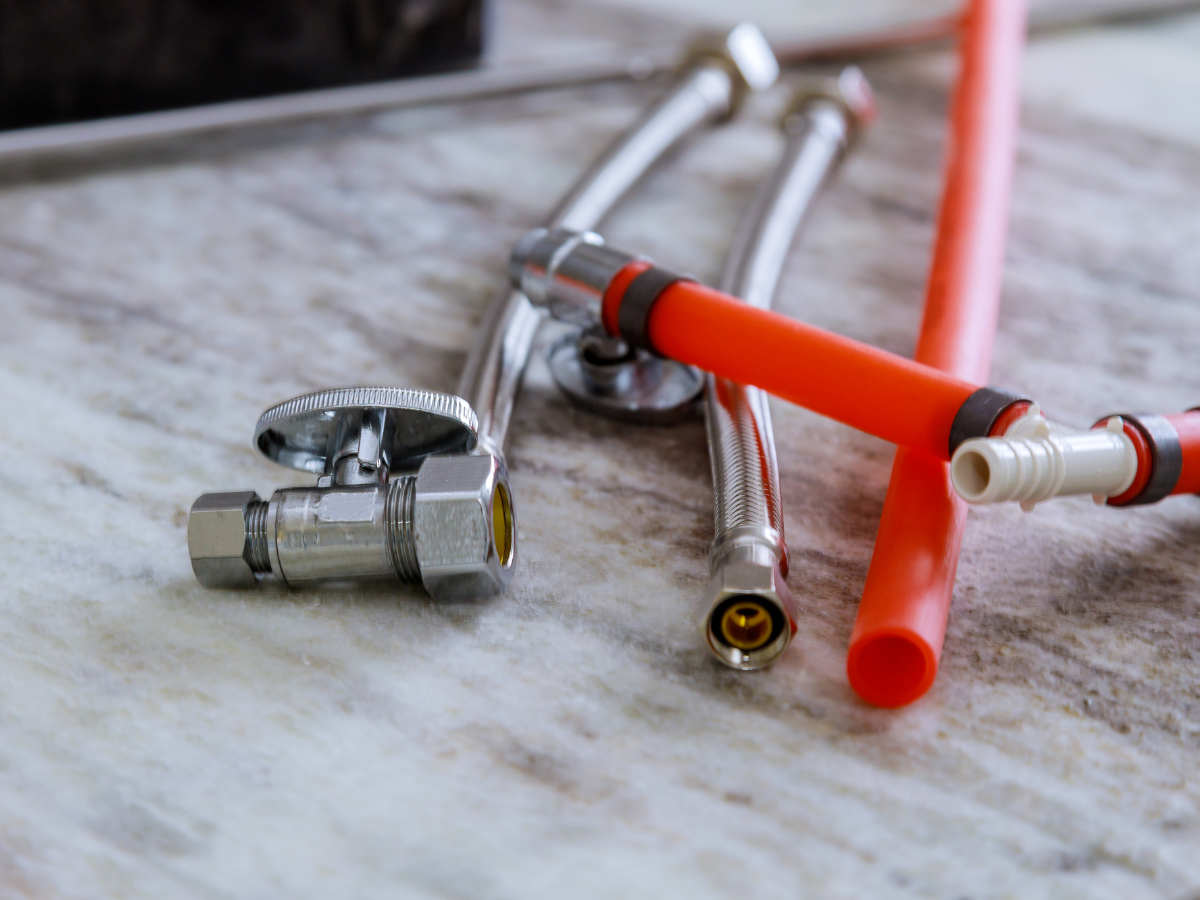
If the cause is simple, such as a partially closed shut-off valve or a clogged aerator, you can probably handle the issue yourself. The shut-off valve, usually found beneath the sink, should be fully open for optimal water pressure. 

As for a clogged aerator (the screen covering the end of the faucet), remove it and clean out built-up mineral deposits and debris. Try soaking it in a vinegar solution to break down the build-up that’s responsible for the clog.

When to Call a Plumbing Technician

However, it’s best to call a professional plumber if your water pressure issues are widespread (affecting more than just the bathroom sink) or if visible leaks or water damage are evident. Plumbing systems can be complex, and trying to fix a major problem alone could lead to further damage. 

Similarly, if the water pressure doesn’t improve after you’ve tried simple DIY fixes, a plumbing professional should be consulted. They have specialized tools and knowledge to diagnose and resolve plumbing issues effectively and efficiently.

By understanding when to opt for DIY and when to contact a professional plumbing service, you can ensure your plumbing system operates smoothly and prevent minor issues from turning into costly repairs.

Preventative Tips for Maintaining Your Bathroom Sink’s Water Pressure

Here’s a quick list of tips that you can use to maintain your bathroom sink’s water pressure:

  1. Regular Faucet Cleaning: Regularly clean your faucet aerators to prevent the accumulation of mineral deposits, which can reduce water pressure. A scrub or a soak in a vinegar solution can do the trick.
  2. Check for Leaks: Be sure to inspect your home for any signs of leaks. Some examples include damp spots or water stains on walls, ceilings, or floors. Detecting and repairing the leaks promptly can prevent water pressure issues.
  3. Maintain Your Home’s Plumbing System: Have a professional plumber regularly check your home’s plumbing system. They can spot and fix minor issues before they lead to significant problems.
  4. Water Pressure Regulator Inspection: If your home has a water pressure regulator, check it regularly to ensure it functions properly. A faulty regulator can lead to low water pressure.
  5. Avoid Partially Closed Valves: Make sure all your water valves, including the main one, are fully open. Partially closed valves can restrict water flow and reduce water pressure.
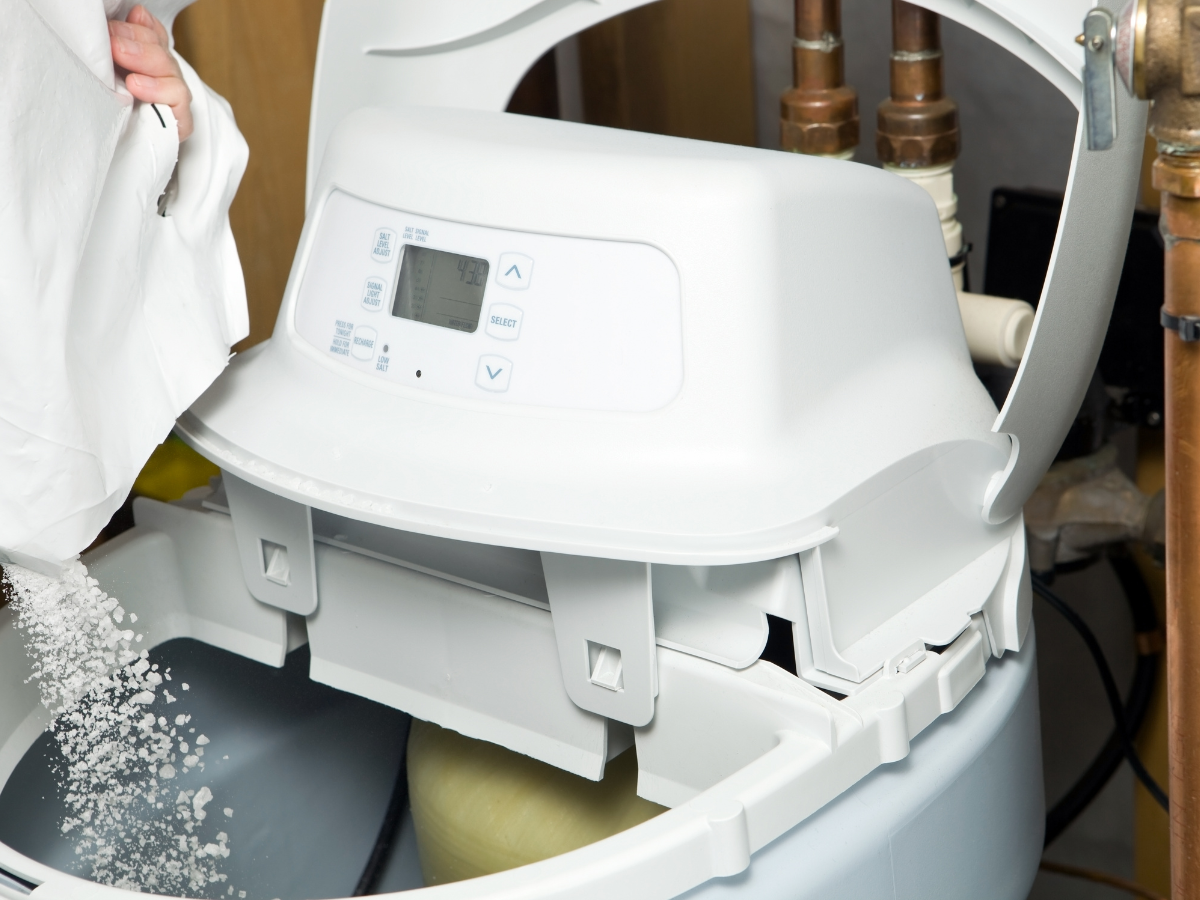
  6. Use Water Softeners: If your home has hard water, consider installing a water softener. It can help prevent mineral build-up in your plumbing fixtures, thus maintaining water pressure.

By adhering to these preventative tips, homeowners can ensure consistent and satisfactory water pressure in their bathroom sinks, avoiding the hassle and cost of frequent repairs.

Installing Low-Flow Fixtures for Consistent Water Pressure

Low-flow fixtures, such as shower heads and faucets, can significantly aid in maintaining consistent water pressure in your bathroom. These fixtures are designed to use less water while providing a solid flow, making them an ideal solution for homes struggling with water pressure issues.

Low-Flow Shower Heads

A low-flow shower head is a relatively simple project that can greatly impact your home’s water pressure. Despite using less water, these shower heads are engineered to deliver a satisfying shower experience by dispersing water more efficiently. This helps maintain good water pressure and reduces the demand on your home’s water supply, freeing up pressure for other fixtures, like your toilet.

Low-Flow Faucets

Similarly, low-flow faucets can make a significant difference in balancing the water pressure in your bathroom. By regulating the amount of water that flows through them, these fixtures ensure a steady, reliable water pressure without overwhelming your plumbing system.

Space & Your Project

The installation of low-flow fixtures only requires a little room, making it a feasible choice, even for smaller bathrooms. Regardless of the size of your bathroom, you can benefit from the consistent water pressure that these fixtures offer.

Identifying the Need

If your bathroom struggles with low water pressure, installing low-flow fixtures could be the solution your family needs. However, it’s crucial to identify the root of the problem. If the low water pressure is due to issues within your plumbing system, such as leaks or a faulty regulator, these should be addressed first. 

Once these issues are resolved, low-flow fixtures can further enhance your bathroom’s water pressure consistency, providing an efficient and enjoyable user experience.

Conclusion

At Full Speed Plumbing in Mount Vernon, Washington, our skilled technicians are always ready to diagnose and resolve your plumbing issues. Contact us today to book an inspection, and let us help you enjoy a hassle-free bathroom experience. You can always trust our team to get the job done right.

Ejector Pump vs Sump Pump: 5 Differences

Welcome to another informative blog from Full Speed Plumbing, your trusted service provider, where our expert plumbers provide you with insights and tips about various plumbing-related topics. 

Today, we’re here to discuss a popular query that often confuses homeowners: What are the primary differences between ejector pumps and sump pumps? If you’ve ever wondered about this, you’re not alone! 

So, let’s dive into this topic and clarify the details. Remember, understanding your plumbing system can save time and money and prevent unwanted hassles for your family members.

What is an Ejector Pump? – A Beginner’s Guide

An ejector pump, often a vital part of a home’s plumbing system, is an ingenious invention designed to manage waste. Generally housed in a sealed pit below your basement level, this pump has a specific purpose – to remove sewage waste and wastewater from your house. 

It operates on the principle of pressure difference and gravity. When the water level in the ejector pump pit reaches a specific point, the pump is activated, propelling the waste upward into the public sewer line or septic tank.

The efficiency of an ejector pump is worth noting. It can handle liquids and solid wastes, making it a common choice for bathrooms located below the sewer line. However, remember that efficient operation depends on proper installation and regular maintenance. 

Here’s where the experience of a trusted technician plays a vital role. A professional technician with extensive experience can ensure your ejector pump is installed correctly and functioning at its peak, saving you from potential plumbing problems down the road. 

Remember, with the right knowledge and expertise, maintaining an efficient plumbing system doesn’t have to be an obstacle.

What is a Sump Pump? – A Detailed Overview

A sump pump is another reliable appliance in your home’s plumbing arsenal, specifically designed to prevent flooding by managing and directing excess water away from your living space. 

Like its ejector counterpart, it operates based on water levels, but its focus is not on sewage but on stormwater and groundwater. These types of pumps are installed in a sump pit in your basement or crawlspace, so they only take up a little space.

The sump pump is triggered as the pit fills with water, either from normal groundwater seepage or during heavy rainfall. It springs into action, pumping out the wastewater and directing it away from your property to a safe distance, which minimizes the risk of damage or flooding. This action of the sump pump efficiently responds to the threat of water damage from weather-related issues or emergency plumbing leaks.

Reliability is a critical attribute when it comes to sump pumps. They stand as vigilant guards, ready to act when the clouds gather, and the rain begins to fall. However, just like ejector pumps, they demand appropriate installation and regular upkeep to function optimally. 

With a skilled worker at your service, you can ensure your sump pump is ever ready to face the flood. Through careful understanding and maintenance, your home’s plumbing system can truly become a fortress against the storm.

What Are The Main Differences Between Ejector Pumps and Sump Pumps?

There are several differences between ejector pumps and sump pumps, including:

1. Purpose

The first striking difference lies in their purpose. An ejector pump is designed primarily for waste management, effectively removing sewage waste and wastewater from your home. On the other hand, a sump pump is specifically created to prevent flooding in your property by managing and directing excess water away from your home.

2. Design and Location

Ejector pumps are generally housed in a sealed pit below the basement level. In contrast, sump pumps are located in a specially constructed sump pit, typically at the lowest point of your basement or crawlspace.

3. Trigger Mechanism

While both operate based on water levels, an ejector pump propels waste upward into the public sewer line or septic tank when the water level in the pit reaches a certain point. Conversely, a sump pump starts working when the pit fills with water from normal groundwater seepage or heavy rainfall, pumping it away from your home.

4. Maintenance

Both ejector and sump pumps require proper installation and regular maintenance for efficient operation. However, due to the nature of the waste they handle, ejector pumps may require more frequent service or replacement of parts.

5. Type of Waste Managed

An ejector pump handles liquid and solid wastes, making it suitable for bathrooms below the sewer line. In contrast, a sump pump deals primarily with stormwater and groundwater, ensuring no water damage or flooding occurs in your home.

Contact Full Speed Plumbing If You Need Help Choosing the Right Pump

As a homeowner in Mount Vernon, Washington, making the right choice between an ejector pump and a sump pump comes down to your specific needs. 

Here’s a simple guide to help determine which one might be right for you:

  • If your home has a bathroom, laundry room, or any other type of plumbing below the sewer line, an ejector pump is an absolute necessity. It will efficiently handle both liquid and solid waste, ensuring it’s safely ejected into the public sewer or septic tank.
  • However, if you’re dealing with frequent water accumulation in your basement or crawlspace due to groundwater seepage or heavy rains, a sump pump is your best option. It will manage this excess water, directing it away from your home and preventing potential flooding and water damage.

It’s essential to remember that both these pumps require professional installation and regular maintenance for optimal performance. Also, as each home is unique, your requirements may differ. 

If you need clarification on which pump fits your needs, feel free to reach out to us at Full Speed Plumbing in Mount Vernon, Washington, at your earliest convenience. 

Our talented team of licensed technicians is always ready to provide reliable customer service and recommendations based on your specific circumstances, ensuring your plumbing system is efficient, reliable, and tailored to your family’s needs.

Give us a telephone call today to schedule an assessment.

Why Is Your Kitchen Sink Gurgling?

Welcome to another informative blog by Full Speed Plumbing! Today, we’ll be deep-diving into a common issue many homeowners face: a gurgling kitchen sink. We’ve all been there, standing at the sink, and suddenly, an unusual gurgle disrupts our peace. It’s as if your drain is trying to communicate! 

But what exactly is it trying to tell us? 

Well, this sound is often a cry for help, indicating an underlying problem with the flow of water in your plumbing system. 

But don’t fret; Full Speed Plumbing is here to guide you through potential issues and professional solutions, ensuring you can once again enjoy a serene, gurgle-free kitchen. 

So, let’s get down to business and decode the mystery of your gurgling sink!

Identifying the Root of the Problem: 4 Causes of a Gurgling Sink

1. Clogged Drains

A simple clog in the drain is one of the most common causes of a gurgling sink. This could be due to accumulated food debris, grease build-up, or other foreign objects that have entered your pipes. The clog acts as a barrier, disrupting the normal flow of water down the drain, which can result in that tell-tale gurgling sound.

2. P-Trap Issues

The P-Trap (the U-shaped pipe under your sink) is crucial in preventing sewer gasses from entering your home. If the water inside this trap evaporates or is pushed out due to high flow, air can pass through, causing a gurgling sound. A leaking or improperly installed P-Trap can also contribute to this issue.

3. Blocked Vent Stack

Your plumbing system includes vent stacks that allow air to escape, ensuring smooth water flow. If these vents are blocked by leaves, bird nests, or other debris, it can create a vacuum in your pipes. This negative air pressure can lead to the gurgling noise you’re hearing.

4. Negative Air Pressure in the Drainage System

Lastly, negative air pressure in the drainage system can cause a gurgling sink. When water drains from your sink, it creates a suction effect. If not properly ventilated, this can produce a gurgling sound. This issue often indicates a more significant problem with your overall plumbing system, requiring professional attention.

DIY Fixes for Gurgling Sinks

Before we delve into professional solutions, here are some DIY fixes you might want to try out:

1. Cleaning the P-Trap

The P-Trap is often a hotspot for clogs, given its curved design. Detaching and cleaning the P-Trap can solve the gurgle. Remember to place a bucket underneath before removal to catch residual water or debris.

2. Using Drain Cleaners

Consider using a drain cleaner to dissolve any stubborn blockages. There are a variety of eco-friendly options available in the market. Always follow the instructions on the label and ensure adequate ventilation during usage.

3. Regular Cleaning

Prevention is better than cure! Regularly cleaning your sink and drain can prevent debris build-up, reducing the likelihood of gurgling. Consider using a mesh drain cover to catch food particles and other debris, making cleaning easier.

These DIY fixes should help resolve minor issues causing your sink to gurgle. However, if the problem persists, it’s time to schedule a maintenance call with the professionals at Full Speed Plumbing! Remember, ignoring a gurgling sink could lead to more significant issues.

Call in the Professionals When DIY Remedies Aren’t Enough

Understanding when DIY remedies aren’t sufficient for your plumbing issues is crucial. Persistent gurgling sounds, despite trying the fixes outlined above, may indicate a more complex problem. It could be a sign of a significant blockage, improper venting, or even a more systemic issue with your plumbing. These are things that a homeowner may not be equipped to diagnose or resolve.

Professional plumbers, like our expert team members at Full Speed Plumbing, bring in-depth knowledge, advanced tools, and years of experience to the table. 

They are trained to identify and address a wide range of plumbing issues, including those that aren’t easily visible or reachable. For instance, blockages or damage deep within your pipes or issues with the vent stacks on your roof are challenges that professional plumbers can handle effectively.

Ignoring persistent plumbing issues can result in more serious complications, such as extensive water damage, mold growth, or even structural damage to your home. Therefore, when DIY fixes aren’t enough for your plumbing project, feel free to rely on the expertise of professional plumbers. They can not only correct the current issue but also provide insights on how to prevent similar problems in the future. 

Remember, a high-quality plumbing system is integral to the health, comfort, and safety of your home!

How to Prevent Future Gurgling

Regular maintenance of your plumbing system is a crucial habit that every homeowner needs to adopt. Not only does it keep your kitchen and bathrooms in top shape, but it also promotes a healthy living environment for your family. 

Here are a few proactive steps you can take to prevent future gurgling in your sinks:

  1. Regular Drain Cleaning: Make it a routine to clean your drains regularly to avoid build-up of food particles, soap scum, and other debris. A simple monthly clean can significantly reduce the likelihood of future clogs and gurgles.
  2. Plumbing Inspections: Consider scheduling professional plumbing inspections at least once a year. These inspections can help detect and fix minor issues before they become major, costly problems.
  3. Educate Family Members: Teach your family about what can and cannot go down the drain. For instance, grease, coffee grounds, and certain food items should be disposed of in the trash rather than the sink to avoid clogs.
  4. Install Drain Screens: Installing drain screens in your kitchen and bathroom sinks can capture larger debris that can block your drain and cause gurgling sounds.
  5. Proper Use of Bathroom Facilities: Educate your family, especially children, about the proper use of bathroom facilities. Toys, hygiene products, and excessive toilet paper should never be flushed down the toilet, as they can block the drain and cause gurgling.

By following these preventative steps, you can significantly reduce the risk of a gurgling sink and maintain the tranquility of your home. As always, if you encounter any significant issues, you need to get in contact with a plumbing service you can trust, like Full Speed Plumbing, for professional assistance.

Conclusion

In conclusion, maintaining a healthy and efficient plumbing system is paramount for a harmonious house. By adopting regular cleaning habits, conducting annual inspections, and educating family members, you can prevent the disquiet brought about by a gurgling sink. 

Remember, when DIY solutions fail to silence the gurgle, help is just a call away. Full Speed Plumbing, based in Mount Vernon, Washington, is equipped with professional expertise and advanced tools to address all your plumbing issues. Don’t let a gurgling sink disturb your peace; reach out to a Full Speed Plumbing technician today!

When to Replace Toilet Water Supply Line

At Full Speed Plumbing, we believe that the key to a well-functioning plumbing system lies in regular and proactive maintenance. One common job often overlooked in home maintenance is replacing the toilet water supply line. 

Despite its seemingly minor role, this component is crucial to the smooth operation of your toilet. A neglected water supply line can lead to serious issues, causing inconvenience and potentially expensive repairs. In this blog, we aim to simplify this project for you. 

We’ll guide you through identifying the red flags indicating it’s time to replace your toilet water supply line and how to do the task. Let’s dive into the world of bathroom plumbing maintenance together.

What is a Toilet Water Supply Line?

The toilet water supply line, often overlooked yet essential, is a component of your plumbing system that connects the toilet tank to your home’s water supply. 

Imagine it as the conduit for fresh water to reach your toilet each time you flush. When you press the flush lever, the supply line delivers water from your home’s main water supply into the toilet tank. This mechanism refills the tank, readying the toilet for subsequent use. 

The line is typically made from materials such as PVC, copper, or braided stainless steel, each with merits and demerits. This silent worker is pivotal in maintaining the health, efficiency, and hygiene of your toilet, contributing to a well-functional living space.

When Should You Replace Your Toilet Water Supply Line?

As a homeowner, you need to know when to replace vital components of your plumbing system. It would be best if you considered contacting a professional plumber to replace your toilet water supply line under the following circumstances:

  1. Visible Corrosion: If you notice signs of rust or corrosion on the water supply line, it clearly indicates that a replacement is required. This corrosion can lead to leaks if not addressed promptly.
  2. Persistent Leaks: If you spot continuous water gathering around the bottom of your toilet, it could be a sign of a leaking water supply line. However, it may seem like a minor issue; if left unchecked, this could lead to substantial water damage.
  3. Age of the Water Supply Line: Like all elements of your house, your toilet water supply line has a lifespan. If your supply line is more than ten years old, it’s a good idea to get it inspected by a professional, as it might be nearing the end of its life expectancy.
  4. Changes in Water Pressure: If you notice a sudden drop in your toilet’s water pressure, it could be due to a faulty water supply line. It’s best to have a professional assess the situation to avoid further complications.

Remember, proactive maintenance is always cheaper and less inconvenient than reactive repairs. At Full Speed Plumbing, we’re the number one choice for plumbing services in Mount Vernon, Washington.

Our team of expert plumbers is ready to assist you with all your plumbing needs. If you notice any of these signs, don’t hesitate to contact us. We are committed to providing efficient and reliable plumbing solutions that keep your home running smoothly.

Replacing Your Toilet Water Supply Line – An In-Depth Guide

Although replacing a toilet water supply line can be a complex task, it’s possible with some help and planning. Here’s a detailed list of everything you’ll need to get the job done:

Tools You Will Need

Before starting the replacement procedure, gather the necessary tools. This will make the process smoother and faster. You will require:

  • Adjustable wrench
  • New water supply line
  • Towel or bucket
  • Measuring tape

Shutting Off The Water Supply

The first step in replacing your toilet water supply line is to shut off the water. Locate the shut-off valve, typically found on the wall or floor near the toilet. Rotate the valve clockwise up until it’s completely closed. Confirm that the water supply is cut off by trying to flush your toilet. If there’s no refilling, you’ve successfully shut off the water supply.

Removing The Old Supply Line

Next, you’ll need to remove the existing water supply line. Place your bucket or towel underneath the connection points to catch any residual water. Using your adjustable wrench, loosen and disconnect the line from the fill valve at the bottom of the toilet tank and the shut-off valve.

Measuring The New Line

Now, measure the distance between the toilet tank’s base (where the previous line was attached) and the shut-off valve. This measurement will help you choose a new water supply line of the appropriate length. Remember, it’s better to choose a slightly longer line than a shorter one, as it offers more flexibility during installation.

Installing The New Supply Line

To install your new supply line:

  1. Start by connecting one end to the fill valve at the base of the toilet tank.
  2. Hand-tighten it to secure the connection.
  3. Attach the other end to the shut-off valve, again hand-tightening it.
  4. Once both ends are secured, use your adjustable wrench to tighten the connections further.
  5. Be careful not to overtighten, as it could damage the connections. 

Finally, activate the water supply by turning the shut-off valve counterclockwise and inspect the area for signs of leaks.

Following these steps, you can replace the toilet water supply line yourself. However, if you encounter any issues, feel free to seek help from a professional plumber that you trust.

Conclusion

Maintaining your home’s plumbing system is vital, and a task as simple as replacing your toilet water supply line can have a significant impact. Full Speed Plumbing, your local drain and sewer line experts in Mount Vernon, WA, are here to assist you with all your plumbing needs. 

Our team is dedicated to providing high-quality customer service and competitive pricing for all our clients. Whether you need assistance with a plumbing renovation or need to schedule an inspection, we’re ready to help give you the peace of mind you’ve been looking for. 

Give us a telephone call to schedule an appointment today. You can count on us to deliver professional, efficient, cost-effective solutions, ensuring your home’s plumbing system remains in top shape. Join the Full Speed Plumbing family and experience the difference with us. 

How to Locate Your Main Sewer Line

Identifying the location of your main sewer line is an important project that often gets overlooked until a problem arises. Full Speed Plumbing is here to emphasize the importance of knowing where your main sewer line is situated and how regular inspection can save you time, money, and an enormous amount of inconvenience down the line.

As a homeowner, understanding the placement of your main sewer line can help prevent accidental damage during home improvements and allows for quicker, more efficient responses when issues occur. Moreover, regular inspection can identify potential problems before they become serious, helping to maintain the longevity of your plumbing system and keep it in tip-top shape. 

Remember, prevention is always better than cure, and that applies to your sewer lines, too. So, let’s dive into the process of finding your main sewer line.

What is a Sewer Line?

A sewer line is an essential component of your home’s plumbing system. It’s a large pipe that carries wastewater from your house — everything from your showers, sinks, and toilets—out to the city sewer main line or a septic tank.

Components of a Sewer Line

The primary components of a sewer line include:

  1. Main Drain Pipe: This is the heart of the sewer line, which facilitates wastewater transportation from your building to the local treatment facility or septic system.
  2. Vent Stacks: These vertical pipes allow sewer gases to escape your plumbing system and safely maintain proper drainage flow.
  3. Cleanouts: These are access points that allow for easy maintenance and cleaning of your sewer line to prevent or clear blockages.

Types of Sewer Lines

There are typically two types of sewer lines:

  1. Municipal Sewer Lines: These are connected to a city or town’s main sewer system. They’re typically found in urban and suburban areas where homes are close together.
  2. Septic Systems: These are individual sewage treatment systems used in areas where municipal sewer lines aren’t available. Septic systems utilize nature and technology to treat wastewater from household plumbing.

By understanding these basics, you’ll be better equipped to maintain your home’s plumbing system and address any issues that might arise.

Steps to Locate a Sewer Line on Residential Properties

Now that you have a basic understanding of sewer pipes, it’s time to learn how to locate them on residential properties. Here’s a thorough, step-by-step guide that you can reference during the process:

Safety First

Before starting the process, always remember safety should be your top priority. Wearing high-quality protective gear, like gloves and safety glasses, is beneficial, as it helps you protect yourself from potential hazards. Ensure you’re not working in a high-traffic area with a higher risk of accidents.

Ground Penetrating Radar (GPR)

GPR is a non-destructive method that is used to detect sewer lines. It uses radar pulses to create an image of the subsurface. This can be an effective and safe way to locate your sewer line without any digging.

Use a Sewer Line Camera

A sewer camera is an innovative tool for visually inspecting your sewer line. The camera is attached to a cable, and the live video feed can be viewed on an attached monitor. This can help identify blockages and damage and confirm the location of your sewer line.

Pipeline Locators

These gadgets can detect the metallic signals from underground pipe systems, accurately revealing their location. They’re especially useful for tracing older sewer lines.

Professional Help

If you are unsure or uncomfortable doing this by yourself, seeking professional service is always a viable option. Plumbers have the training and the right tools to locate your main sewer line efficiently and safely.

Locating your main sewer line is a vital part of home maintenance. You can prevent potential damage and costly repairs by using the right tools and techniques and observing the necessary safety measures.

Common Signs of Sewer Line Problems

Recognizing the early signs of sewer line damage or blockage can save you from more significant issues down the line. While these signs can vary, certain common indicators suggest a problem with your sewer line.

  1. Slow Drains and Recurrent Clogs: An obvious sign of a sewer line problem is slow drainage in your sinks, bathtubs, or showers. If you notice that water isn’t flowing down your drains as quickly as it usually does, or if clogs keep recurring despite your best efforts to clear them, it might indicate a problem with your main sewer line.
  2. Foul Odors and Sewage Backup: An unpleasant odor emanating from your drains is another clear sign of a possible sewer line issue. The smell is typically a sewage-like odor. If the problem is severe, you might even experience sewage backup in your toilets or drains.
  3. Soggy Spots or Sinkholes in The Yard: Your lawn can also give you indicators of a sewer line issue. If you notice soggy patches of grass or unexplained sinkholes, it might be due to a leak in your sewer line, causing wastewater to seep into your yard.

If you encounter any of these signs, contacting a professional plumber is crucial. They can conduct a thorough inspection and repair any issues, protecting the health of your home and family, and potentially saving you significant repair costs in the long term.

How to Locate Your Main Sewer Line – Conclusion

In conclusion, understanding your home’s plumbing system, particularly the sewer line, is an integral part of maintaining a healthy, safe, and efficient household. 

From identifying the signs of a damaged or clogged line to knowing how to locate and understand the essential components of a sewer line, you are now equipped with the knowledge to handle minor issues and prevent significant, costly damages.

However, it’s always best to rely on trusted professionals for matters beyond your grasp. If you encounter any of these signs, don’t hesitate to reach out to Full Speed Plumbing—the technicians you can trust for any plumbing project. 

Our expert team has the knowledge, tools, and experience to ensure your home’s plumbing system is in top condition. Choose peace of mind. Choose Full Speed Plumbing for all your plumbing needs; we guarantee we can get the job done.

Give us a telephone call for more information.

5 Most Common Sump Pump Problems and Their Causes

At Full Speed Plumbing, we believe in empowering our customers with knowledge to make informed decisions about their plumbing needs. One such area often overlooked is the humble sump pump, a silent hero protecting your home from water damage. But even heroes might have a bad day. 

So, what happens when your sump pump decides to take an unexpected break? In this article, we’ll delve into the most common sump pump issues and their causes. 

By the end, you’ll have a clear idea of what might be troubling your sump pump and how to address it. Let’s get started!

Common Causes of Sump Pump Problems

Even though sump pumps are relatively reliable units, issues do occur from time to time. Each of these issues stems from their own causes. Some examples  of these causes include:

  1. Lack of Maintenance: Sump pumps need regular servicing, and without it, their performance can degrade over time. Lack of maintenance can lead to a wide range of issues, such as motor failure, switch problems, or even a decrease in pumping capacity. Regular check-ups and periodic cleaning can help keep your sump pump unit in good working condition and extend its lifespan.
  2. Clogs and Blockages: Sump pumps are prone to clogs and blockages, which can severely hamper their functionality. Debris, gravel, or even accumulation of dirt can clog the pump’s intake screen, causing it to run continuously and eventually burn out. It’s recommended to clear out any visible debris and consider installing a cover to prevent future clogs.
  3. Power Failure: A power outage is the most common reason for sump pump failure. Most sump pumps rely on your home’s electrical system; a power outage can render them useless. It’s always a good idea to have a battery backup system in place for these scenarios.
  4. Flooding or Heavy Rain: Sump pumps are designed to handle a specific water capacity. In events of heavy rain or flooding, the pump might get overwhelmed and stop working due to the sheer volume of water. In such cases, you might need a secondary pump in your basement to help manage the excessive water flow.

By being aware and taking preventive measures, you can avoid these common problems and ensure your sump pump performs when needed.

The Most Common Sump Pump Problems Homeowners Face

Let’s take a deeper look at the specific problems your sump pump might encounter:

  1. Switch Problems: The switch controls the operation of your sump pump. Problems occur when the switch gets stuck in either the on or off position due to debris or a misplaced float.
  2. Overworked Pump: Often, the pump might have to work extra hard if it’s not the right size for your home or if you are dealing with more water than it can handle. This can lead to the unit burning out prematurely.
  3. Frozen or Clogged Discharge Lines: The discharge lines carry water away from your home. However, they can get clogged with debris or even freeze in winter, causing water to back up and potentially cause a flood.
  4. Old Age: Sump pumps don’t last forever. Most parts wear out after 7 to 10 years of service, and performance declines. If your pump is within this age range, consider a replacement.
  5. Improper Installation: Sump pump units need to be installed correctly to function as expected. An improperly installed pump may lead to constant cycling, short cycling, or other issues.

By understanding these common sump pump problems, you can better anticipate what might go wrong and take proactive measures to prevent these issues. Remember, a well-maintained sump pump protects your home from water damage.

Step-by-Step Instructions for Assessing Sump Pump Performance

Now that we understand the common issues that plague sump pumps, let’s outline the steps to assess your sump pump’s performance effectively:

  1. Checking Power Supply: Start by checking the power source of your sump pump. Ensure it’s plugged into a functioning outlet. You can test the outlet using a different device to confirm it works. If the outlet is fine, but the pump isn’t running, you might have a power failure issue.
  2. Inspecting Sump Pump Switches: Switch problems are common in sump pumps. Check if the switch is moving freely and isn’t hindered by debris or the position of the float. A stuck switch tends to lock the pump in either an ‘on’ or ‘off’ state, causing operational issues.
  3. Clearing Clogs and Debris: Regularly inspect your sump pump for clogs and debris. Check the intake screen for any blockages and clean it out if necessary. A clogged pump can cause the motor to run continuously and burn out eventually.
  4. Testing Float Switches: The float switch triggers the pump to start when the water reaches a certain level. Test it by running water into the sump pit and observing if the pump kicks in when the water reaches the designated level. You might need to adjust or replace the float switch if it doesn’t.

By following these troubleshooting tips, you can conduct a basic yet practical assessment of your sump pump performance. That being said, teaming up with an expert, like one of our team members at Full Speed Plumbing, for regular checks and maintenance can prevent common issues, ensuring your household remains protected against potential water damage.

5 Most Common Sump Pump Problems and Their Causes – Conclusion

Understanding the common issues that can affect your sump pump, from switch problems to power failures, is key to safeguarding your home against water damage. Stay one step ahead by regularly inspecting and maintaining your pump, clearing any blockages, and ensuring its correct operation. 

Still, if you find the task daunting or your sump pump shows signs of failure despite your best efforts, feel free to reach out to our experts at Full Speed Plumbing. Our trained professionals are equipped to diagnose and resolve any sump pump issue, ensuring optimal performance and providing your home with the protection it needs. 

Call us today to experience the peace of mind that comes from knowing your property is safe from potential water damage.

How Long Does It Usually Take To Install A New Sink?

Are you planning to give your kitchen a fresh look by installing a new sink? At Full Speed Plumbing, we are here to guide you through everything you need to know. 

Installing a sink might seem daunting, but in reality, it’s a fairly straightforward process that can be completed within a few hours to a whole day, depending on various factors. This blog post aims to give you a clear understanding of the installation process, including the time it takes, helping you schedule your day accordingly. 

So, let’s dive into the world of kitchen sink installations and turn your kitchen revamp dream into reality.

Sink Installation Process

Here’s a quick overview of the process you’ll need to follow to install a new sink:

Cutting Holes in the Countertop

First and foremost, you need to cut holes in your countertop. This may seem unsafe, but with the right tools and a measured approach, you can carry out this task with precision. You’ll need to accurately mark the area where the sink will sit, ensuring that the dimensions are perfect for your chosen sink. Once you’ve marked the area, use a jigsaw or another suitable tool to cut out the section carefully.

Attaching Plumbing Connections

After you’ve prepared the countertop, the next step is to attach the plumbing connections. Here, you will deal with the water supply lines and the drain. The water supply lines can be connected using adjustable wrenches, while the drain assembly is typically screwed into place. Remember to apply plumber’s putty or a similar sealant around the drain opening to ensure a watertight seal.

Securing the Sink in Place

The final step is to secure the sink in place. This involves setting the sink into the cut-out section of the countertop and securing it with mounting clips that are included with your sink. Apply a bead of silicone caulk around the edge of the sink to create a watertight barrier. Once this is done, you can recheck all your connections and make sure everything is tight and secure.

With these steps, you should be able to install your new kitchen sink effectively. Remember, though it can be a DIY project, feel free to call a professional if you encounter any difficulties or have doubts about any part of the installation process.

Time Frame for Professional Sink Installation

Several factors come into play when considering how long it takes for a professional to install a new sink. Typically, a skilled plumber from Full Speed Plumbing can install a new sink in your kitchen or bathroom within three to five hours. This includes time allocated for removing the old sink, preparing the area, installing the new one, and testing the setup to ensure everything works perfectly.

However, remember that the duration can vary depending on the complexity of the installation, the type of sink, the conditions of your plumbing, and whether any unforeseen issues arise during the process. If your new sink has a different size or design than your old one, or if additional plumbing work is needed, the installation process may take longer.

Our team at Full Speed Plumbing is dedicated to providing you with the best service, ensuring that the installation is done with precision and in the shortest possible time. So, if you plan to install a new sink, you can rely on us to complete the job efficiently and professionally.

DIY vs. Hiring a Professional: A Time Perspective

Choosing between a Do-It-Yourself (DIY) approach and hiring a professional for sink installation can significantly affect the time commitment involved.

DIY Approach

Undertaking the sink installation process yourself can be time-consuming, especially if you’re not familiar with plumbing work. Depending on your skill level and familiarity with the process, a DIY approach may take anywhere from a whole day to a weekend. 

Although this method might save you the cost of professional labor, it requires a substantial time commitment, and the potential for errors is higher. It’s also worth considering that any mistakes could lead to additional costs and time spent correcting them.

Hiring a Professional

In contrast, a professional from Full Speed Plumbing can typically install a new sink within three to five hours. Professional plumbers come equipped with the necessary tools, skills, and experience to handle installation efficiently, which drastically reduces the time involved. Though this option involves labor costs, it saves you the time and hassle of doing it yourself and ensures a correctly installed sink.

While the DIY approach may be suitable for those with ample time and a knack for hands-on work, hiring a professional is quicker and offers peace of mind, knowing the job is done correctly. At Full Speed Plumbing, we strive to provide efficient, high-quality services to make your sink installation as smooth as possible.

How Long Does It Usually Take To Install A New Sink? – Conclusion

In summary, installing a new sink, whether as part of a renovation project or maintenance upgrade, can be a straightforward task with the right knowledge and tools. However, the duration significantly varies based on your approach. While the DIY route might seem budget-friendly and rewarding for some, it requires a substantial time commitment and poses a higher risk of errors. 

On the other hand, hiring a professional from Full Speed Plumbing ensures efficiency, precision, and a hassle-free experience, completing the task within just a few hours. So, for your next kitchen or bathroom upgrade, remember that Full Speed Plumbing is here to assist you every step of the way. 

Don’t compromise on time or quality; reach out to our team for expert plumbing solutions tailored to your needs and budget.

Water Softener vs Water Conditioner: 4 Key Differences

At Full Speed Plumbing, we understand how important it is to have access to quality water in your households. One common concern for many homeowners is dealing with “hard” water. But what is hard water, and why is it a problem? 

As time passes, the minerals in hard water can build up in your plumbing system, leading to potential issues. This is where water softeners and water conditioners come into play. They both deal with the hardness issue but in different ways.

So, how do you decide which water treatment appliance is the best fit for you? In today’s article, we’ll explore the key differences between water softeners and water conditioners, helping you make a more informed decision. 

Continue reading to dive into today’s blog post!

What is a Water Softener?

A water softener is a device specifically designed to combat the problem of hard water. It operates through a process known as “ion exchange”, where it removes microscopic minerals that can’t be seen by the human eye, particularly calcium and magnesium, and replaces them with sodium or potassium ions. This swap is crucial as it prevents the buildup of these minerals in your plumbing.

But a water softener’s role goes beyond just protecting your pipes. Treating hard water improves the efficiency and lifespan of household appliances that use water. In addition, it contributes to better lathering with soaps and detergents, leading to cleaner dishes and softer clothes. So, a water softener saves your plumbing and enhances your day-to-day household activities.

What is a Water Conditioner?

A water conditioner is another solution for managing hard water issues in your home. Unlike water softeners, water conditioners do not remove the minerals from the water. Instead, they undergo a process called “scale inhibition”. This process involves modifying the structure of the minerals, preventing them from depositing and forming scale on your pipes and appliances.

In other words, water conditioners handle hard water differently by leaving the minerals intact but neutralizing their ability to cause buildup. This means you still reap the benefits of having these minerals in your water without the adverse effects on your plumbing and appliances. 

Water conditioners are also environmentally friendly as they do not introduce sodium into the water supply. Therefore, they are an excellent choice for homeowners who want to manage hard water issues while maintaining a green household.

Water Softener vs. Water Conditioner – What Are the Key Differences Homeowners Should Be Aware Of?

Here are some key differences between water softeners and water conditioners that homeowners should be aware of:

  1. Technology: Water softeners use ion exchange to remove hard minerals from water. On the other hand, water conditioners employ a process called scale inhibition to alter the structure of these minerals, preventing them from causing buildup.
  2. Family: Water softeners can be more beneficial to families as they improve the lathering of soaps and detergents, leading to cleaner dishes and softer clothes. However, water conditioners leave beneficial minerals in the water, which can be a healthier choice for your family.
  3. Innovation: While water softeners and conditioners are innovative solutions to manage hard water, their approaches differ. Water softeners leverage tried-and-true ion exchange technology, while water conditioners offer a newer, environmentally friendly solution that neutralizes the effects of hard minerals instead of removing them.
  4. Filtration: Both devices help improve the overall quality of your water. However, water softeners exchange the hard minerals for sodium or potassium ions, technically altering the water’s composition. Water conditioners, on the other hand, merely change the structure of the minerals, leaving your water’s original mineral content untouched.

By learning these differences, you can make an informed decision on which solution best fits your household needs.

Should You Invest in a Water Softener or a Water Conditioner?

Deciding between a water softener and a water conditioner largely depends on your specific needs and preferences.

At Full Speed Plumbing, we recommend investing in a water softener if your primary concern is the prevention of mineral buildup in your pipes and appliances, as well as improving the efficiency of soaps and detergents. A water softener is also an excellent choice if you frequently notice spots on washed dishes or dryness in your skin and hair after a shower.

On the other hand, if you prefer to maintain the mineral composition of your water while still mitigating the effects of hard water, a water conditioner would be a better choice. Water conditioners are also ideal if you are environmentally conscious and want to avoid introducing sodium into the water supply.

By evaluating your unique needs and priorities, you can determine which approach best fits your home. Whether it’s a water softener or a conditioner, you should contact a professional plumber, like one of our team members at Full Speed Plumbing, who is committed to helping you find the best solution for your hard water issues.

Water Softener vs Water Conditioner: 4 Key Differences – Conclusion

Understanding the impact of hard water on your home’s plumbing fixtures and the overall quality of water is crucial. Whether you choose a water softener or a water conditioner, both systems provide effective strategies for managing hard water issues. 

A water softener will remove hard minerals, enhancing the effectiveness of soaps and detergents, while a water conditioner changes the structure of these minerals, preventing build-up without altering the water’s mineral composition. The result is a more efficient household, longer-lasting appliances, and improved water quality. Regular maintenance of these systems is key to ensuring they continue to operate effectively. 

At Full Speed Plumbing, we not only help you make an informed decision about water purification but also provide comprehensive services to keep the product running at peak performance. Our commitment to customer education ensures you are always well-informed about the state of your home’s water and plumbing. 

Ultimately, the decision between a water softener and a water conditioner depends on your individual household needs and environmental considerations.

4 Signs That You’re Dealing With A Gas Line Leak

A gas line leak is a problem that demands immediate attention, and recognizing the signs is the first step towards ensuring the safety of your home. 

Welcome to Full Speed Plumbing’s blog, where we aim to equip you with crucial information to help you identify a gas line leak. In today’s article, we’ll review some tell-tale signs that might suggest you’re dealing with a gas line leak.

Early detection can make all the difference and we’re here to help guide you through it, one sign at a time.

What is a Gas Leak?

A gas leak refers to escaping natural gas, typically from a pipeline or other containment, into an area where it shouldn’t be. This can pose significant safety hazards, from fire risks to health issues due to prolonged exposure. Understanding the culprits behind gas leaks is essential in prevention efforts.

Common Causes of Gas Line Leaks

Several factors can cause a gas line leak. Here are some of the most common:

  • Corrosion: Metal gas pipes can corrode over time, especially if they’re exposed to moisture. This corrosion can weaken the pipe, leading to small leaks that may gradually worsen.
  • Aging Pipelines: Like everything else, gas lines have a lifespan. Old pipelines can become weak and break down, creating a potential for leaks.
  • Excavation Damage: Gas lines can be damaged during excavation work. If a line is accidentally hit during digging, it could result in a leak.
  • Poor Installation: If gas lines aren’t installed correctly, they may not hold a proper seal. This can cause gas to escape.
  • Improper Maintenance Practices: Inadequate or improper maintenance can lead to gas leaks. It’s crucial to have your gas lines regularly inspected and maintained by a professional technician.

Knowing these causes, you can take proactive steps to maintain your gas lines and prevent leaks.

Warning Signs of a Gas Line Leak

If you suspect a gas line leak in your building, it pays to be familiar with the warning signs. Knowing what to look for lets you act quickly and ensure your safety. 

Here are the key signs indicating a possible gas leak:

  • Unusual Hissing or Blowing Sounds: If you hear a hissing or blowing sound coming from the area where your gas lines are located, this could be a sign that you have a gas leak. These sounds are caused by gas escaping rapidly from the pipes.
  • Dead Vegetation Near the Gas Line: Look out for patches of dead grass or plants near your gas line. Natural gas inhibits the ability of plants to absorb oxygen, causing them to die off.
  • Physical Symptoms: Prolonged exposure to natural gas can cause physical symptoms such as dizziness, headaches, nausea, and fatigue. If you or your family members are experiencing these symptoms without a clear cause, it could be a sign that there’s a gas leak.
  • Smell of Gas: Natural gas is odorless and colorless, but utility companies add a chemical to give it a distinctive smell, often described as similar to sulfur and rotten eggs. If you notice this odor in your house, it’s a strong sign of a potential gas leak.

Remember, these signs may not always be evident, but if you notice any of them, you must take immediate action. Call a professional to inspect your gas lines and ensure your home is safe.

Safety Precautions When Dealing with Gas Leaks

If you suspect a gas leak in your home, your safety and the safety of your family should be your top priority. Here are several critical steps you should follow immediately:

  1. Turn Off the Gas Supply: If it’s safe and you know how to do it, turn off the gas supply. This helps to prevent more gas from leaking out.
  2. Avoid Any Open Flames: Prevent a potential fire or explosion by avoiding all open flames. This includes not lighting candles, using a gas stove, or even smoking.
  3. Ventilate the Area: Open all windows and doors to help diffuse the gas and reduce its concentration in your home.
  4. Evacuate if Necessary: If the smell of gas is strong, or if you continue to experience physical symptoms related to gas exposure (like dizziness or headaches), evacuate the property immediately.
  5. Contact Emergency Services: Once you’re safe, contact emergency services or your local gas company. They have the necessary experience and equipment to handle the situation safely.

Remember, suspicion of a gas leak is a serious matter and should be treated as such. Always prioritize safety, and don’t hesitate to seek professional help when in doubt.

Who Should You Contact If You Suspect a Gas Leak?

When it comes to detecting and repairing gas leaks, professional help is your best resource. Spotting a possible gas leak may sound like a DIY task, but confirming it, locating it, and repairing it requires a level of expertise and specific tools that most homeowners do not possess. This is where services like Full Speed Plumbing come into play.

Our team at Full Speed Plumbing is equipped with specialized tools and training to detect and repair gas leaks safely, reducing the risk of gas-related accidents significantly. Attempting to address a gas leak by yourself could not only result in further damage but also expose you and your family to severe safety risks. 

Professionals also ensure that the job is done with accuracy and precision, preventing future leaks and saving you time and money in the long run.

In addition, Full Speed Plumbing provides regular maintenance checks to identify vulnerabilities, such as corrosion or aging pipelines, before they become significant issues. Thus, turning to professionals like us grants you peace of mind, knowing that your home is safe from potential gas hazards. Remember, your safety is our priority.

4 Signs That You’re Dealing With A Gas Line Leak – Conclusion

In conclusion, the importance of regular inspection and maintenance of your gas lines cannot be overstated. Gas leaks pose a significant risk, but with the awareness of common causes, knowing the warning signs, and adhering to necessary safety precautions, you can ensure the well-being of your household. 

Confronting these risks should not be a burden you bear alone – lean on the expertise of a professional plumber from Full Speed Plumbing. Our technicians are well-equipped to detect and repair gas leaks, reducing potential safety threats. 

Breathe easy and let us relieve the pressure; we provide regular inspections and thorough cleaning of your gas lines to prevent future leaks. Don’t leave your safety to chance. Contact Full Speed Plumbing via phone call or our website for a comprehensive gas line inspection and live with the peace of mind you deserve.

What Can Go Down A Garbage Disposal?

If you’ve ever found yourself standing in your kitchen, questioning whether it’s okay to put that leftover food down your garbage disposal, you’re not alone. It’s a common query that often leaves homeowners second-guessing. 

Today’s blog aims to clear the confusion by discussing what can and can’t go into your garbage disposal. We’ll delve into the kinds of waste that could cause a clog and tips on how to keep your kitchen plumbing running smoothly. 

So, let’s dive right in!

Why Should You Use a Garbage Disposal to Reduce Your Food Waste?

Reducing food waste is a pressing concern for homeowners in the United States. Not only does it contribute to environmental sustainability, but it can also protect the functionality of your kitchen equipment. 

Garbage disposals serve as an essential tool in managing food waste efficiently. They grind soft food waste down to a size that can easily pass through plumbing, preventing potential damage to your drain pipes caused by blockage. 

Yet, it’s crucial to remember that these devices can’t handle every type of waste – some items are better suited for trash bins or compost piles. Non-fibrous food scraps like vegetable peels, fruit skins, and coffee grounds can be the foundation of nutrient-rich compost for your garden. 

By understanding the need and value of effective waste management, homeowners can make the most of their garbage disposal, prolong its lifespan, and contribute to a greener planet.

3 Items You Can Put in Your Garbage Disposal

Have you ever wondered what you can put down your garbage disposal after cooking for dinner? Here’s a quick list of items that your disposal can handle with ease:

Soft Food Waste

This is the waste your garbage disposal is made to handle. Leftovers like pasta, rice, and bread are good examples. Soft food waste is easily broken down and won’t cause any harm to your disposal unit. But remember, always run cold water while the disposal is in operation to help the process.

Non-Fibrous Vegetables

Not all vegetables are created equal when it comes to your garbage disposal. Non-fibrous vegetables such as lettuce, cucumbers, tomatoes, and zucchini are safe to put down. Items like orange, lemon, and other citrus peels can go down a garbage disposal smoothly. They’re soft enough to be ground down efficiently. 

However, avoid hard, fibrous, or starchy veggies like celery, corn husks, or potatoes, as grinding them up can cause a clog.

Liquids

Most liquids are okay to pour down your garbage disposal. They can actually help in cleaning the unit, especially when used with a little dish soap. However, avoid pouring grease or oil down the disposal (or your sink) as they can solidify and cause blockages over time.

By following these guidelines, you can ensure the longevity of your garbage disposal and keep your kitchen plumbing running smoothly.

3 Items That You Should Never Put in Your Garbage Disposal

Even though garbage disposals can break down a number of different types of food waste, they aren’t built to dispose of everything. We suggest that you never put the following items down your disposal unit:

Fibrous Fruits and Vegetables

Certain fruits and vegetables like rhubarb, celery, corn husks, onion skins, artichokes, and pineapple tops have tough, fibrous textures. These can tangle around the garbage disposal blade, leading to blockages and potential malfunctions. They are best disposed of in your regular trash or compost bin.

Bones

Whether it’s chicken bones or fish bones, they are a big no for your disposal unit. Their hardness can dull the blades, leading to inefficient operation. Moreover, they can become lodged in the mechanism, leading to serious damage. It’s advised to dispose of bones in your regular trash.

Non-Food Waste

Garbage disposals are designed to handle food waste only. Homeowners should never put non-food items such as debris, dirt, paper, plastic, metal, cigarette butts, or cloth should never be put into a garbage disposal. These materials can dull or damage the blades and potentially lead to costly repairs.

By avoiding these items in your garbage disposal, you can prevent unnecessary clogs and maintain the efficiency of your unit. Remember, when in doubt, it’s better to toss it out!

What Happens If You Use Your Garbage Disposal Incorrectly?

Mishandling your garbage disposal can result in a series of unfortunate events, some of which include:

  • Clogs and Blockages: Incorrect use, such as disposing of unsuitable items, can lead to clogs in your plumbing system, hampering the water flow, causing potential backups, and producing an unwanted odor.
  • Damage to Blades and Motor: Hard and fibrous materials can dull the blades, reducing the efficiency of your disposal unit. In some cases, these items can become wedged in the motor, leading to serious damage and costly repairs.
  • Environmental Impact: Inefficient waste management not only affects your home but can also have severe environmental consequences. Clogged pipes can lead to sewage backups and leaks, introducing harmful contaminants into local waterways. By using your garbage disposal correctly, you not only ensure the longevity of your appliance but also contribute to ecological preservation.

Remember, when it comes to the welfare of your home and the environment, every little bit counts!

Who Can You Call To Fix Your Garbage Disposal?

When you encounter problems with your garbage disposal, it’s highly recommended to call on the expertise of professional plumbers, such as those at Full Speed Plumbing. 

With a team of highly trained and experienced professionals, they provide a range of repair services, ensuring your garbage disposal functions optimally. Their experts have in-depth knowledge of garbage disposal systems, allowing them to identify and rectify problems swiftly and efficiently. 

By engaging Full Speed Plumbing’s services, homeowners can avoid the risk of further damaging their equipment or causing injuries due to DIY repairs. Leave the hard work to the professionals and enjoy peace of mind knowing your garbage disposal is in expert, capable hands.

What Can Go Down A Garbage Disposal? – Conclusion

As you can see, proper care and usage of your garbage disposal can ensure its longevity and contribute to a safer, greener environment. This includes understanding what can and can’t go down your disposal, as well as knowing when it’s time to call in the experts. 

Don’t let an error cause you unnecessary stress or compromise the safety of your home. Trust the knowledgeable team at Full Speed Plumbing to handle any issues swiftly and efficiently. 

For more information about the logistics of garbage disposal care or to schedule a service call, visit our website or contact us directly. Remember, when it comes to your garbage disposal, it’s better to be safe than sorry. Choose Full Speed Plumbing, your partner in maintaining a smooth and functional home.

Have a plumbing emergency?
Let Full Speed Solve Your Plumbing Woes

We're all revved up to serve you. To get started, give us a call at or request service online today.

Wrench

Contact Information

Local Office

17675 Washington 536
Mount Vernon, WA 98273
Full Speed Plumbing

Full Speed Plumbing's mission is to forge ahead full speed when answering the call of our customers. The service we offer is quick and empathetic as our team provides options and education.


© Full Speed Plumbing | All Rights Reserved. (360) 680-1264

Request Service