Find a plumber near you

We're Available 24/7! (360) 610-7901

Author: kristinia

How to Tell If Your Sump Pump Is Working Properly

Full Speed Plumbing understands how essential a sump pump is to your home. It acts as your first line of defense against water seeping into your basement, safeguarding your property from potential damage. 

But how can you tell if it’s functioning correctly? 

In this blog post, we’ll guide you through the key signs to look out for in determining whether your sump pump system is working properly. This way, you can ensure your basement stays dry, and your plumbing system remains intact, no matter what the weather throws your way. So, let’s dive in!

So, let’s dive in!

What is a Sump Pump and How Do They Work?

A sump pump is an essential problem-solving tool found in many homes. Think of it as an invisible superhero, continuously on guard, ready to protect your home. 

So, what exactly is it? 

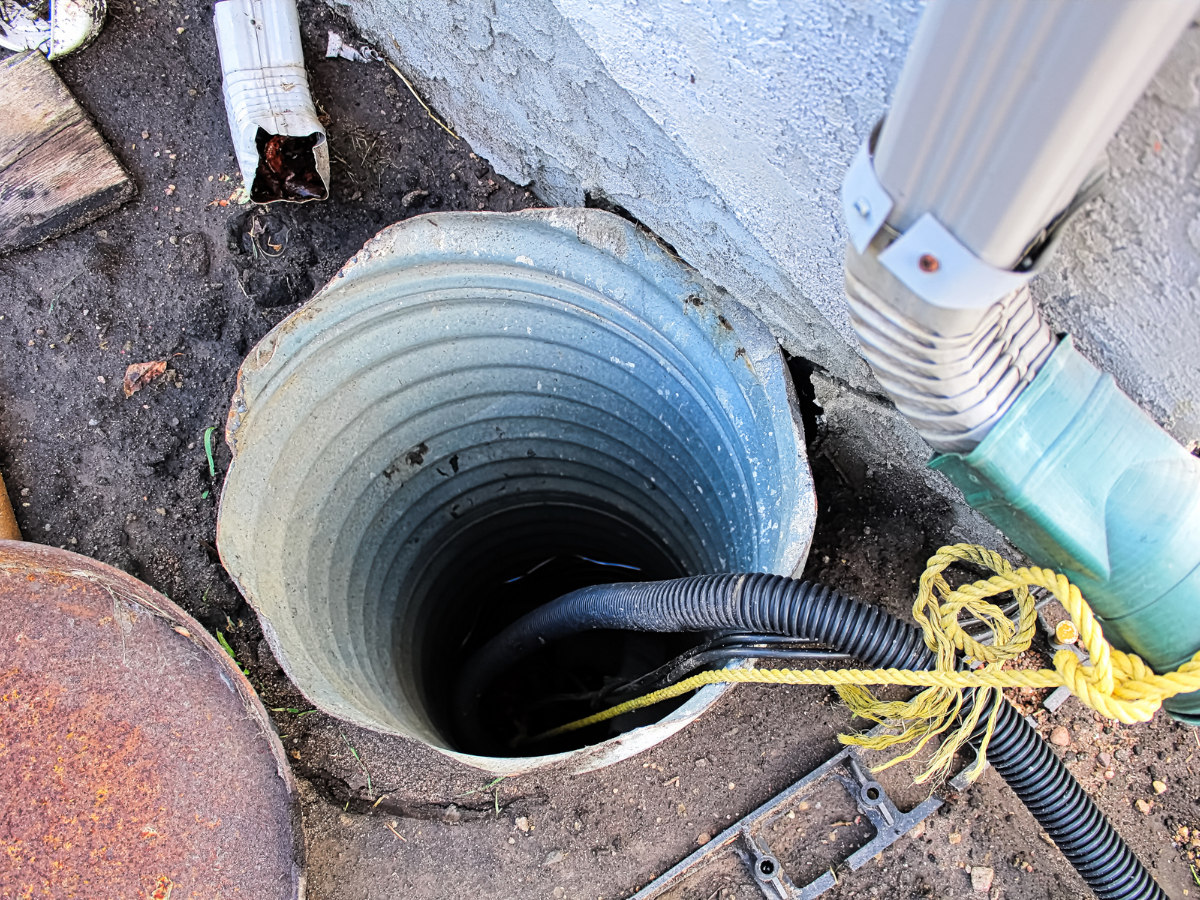
It’s a device designed to tackle the problem of floods, particularly in areas that are prone to heavy rain. Sump pump units are generally installed in the lowest part of a basement or crawl space; their primary role is to help keep the area under the building dry and to prevent it from flooding.

How Do They Work? 

Well, it’s quite simple. A sump pump is installed into a pit (also known as a ‘sump’) and works by automatically pumping out water that collects in this pit. 

Whenever rain pours, or snow melts rapidly, causing water levels to rise, the sump pump senses it and springs into action. It starts to channel water away from your home into a nearby storm drain or sewerage system, preventing any potential damage from water intrusion. 

By doing so, it ensures your home remains dry and damage-free. So, come rain or shine, a sump pump is your steadfast ally, always ready to defend your home against the nefarious enemy that is water damage!

Evaluating Your Sump Pump

Continuously testing and assessing your sump pump is imperative for guaranteeing its peak performance and ensuring a moisture-free basement. Routine cleaning sessions and inspections allow for early detection of potential problems, reducing the risk of water-linked damages.

Pre-test Preparations

Before commencing the sump pump test, the necessary tools must be at hand:

  • A container or large bin to collect water
  • A garden hose, if needed

Moreover, observe the following safety precautions:

  • Disconnect your sump pump from the power source
  • Wear reliable safety gear, such as gloves and protective eyewear

Detailed Instructions for Sump Pump Assessment

For a practical evaluation of your sump pump, follow the procedure below:

  1. Manual Activation: Without plugging the pump into the power source, fill the sump pit with water to the float level, simulating a real-world water level rise that would trigger the pump. Verify if the pump initiates automatically.
  2. Inspecting Effective Water Discharge: Once the sump pump starts, assess its capacity to drain the water from the pit effectively. Be vigilant for any irregularities, such as slow discharge or unusual noises.
  3. Checking Switch Function: The sump pump should switch off as the water level decreases. During this stage, examine the switch for any operational glitches or inconsistencies.

Maintaining these steps and noting any irregularities during the evaluation process will help ascertain the efficient functioning of your sump pump. If any issues arise or you suspect irregular sump pump operation, we advise contacting professionals for detailed examination and necessary repairs.

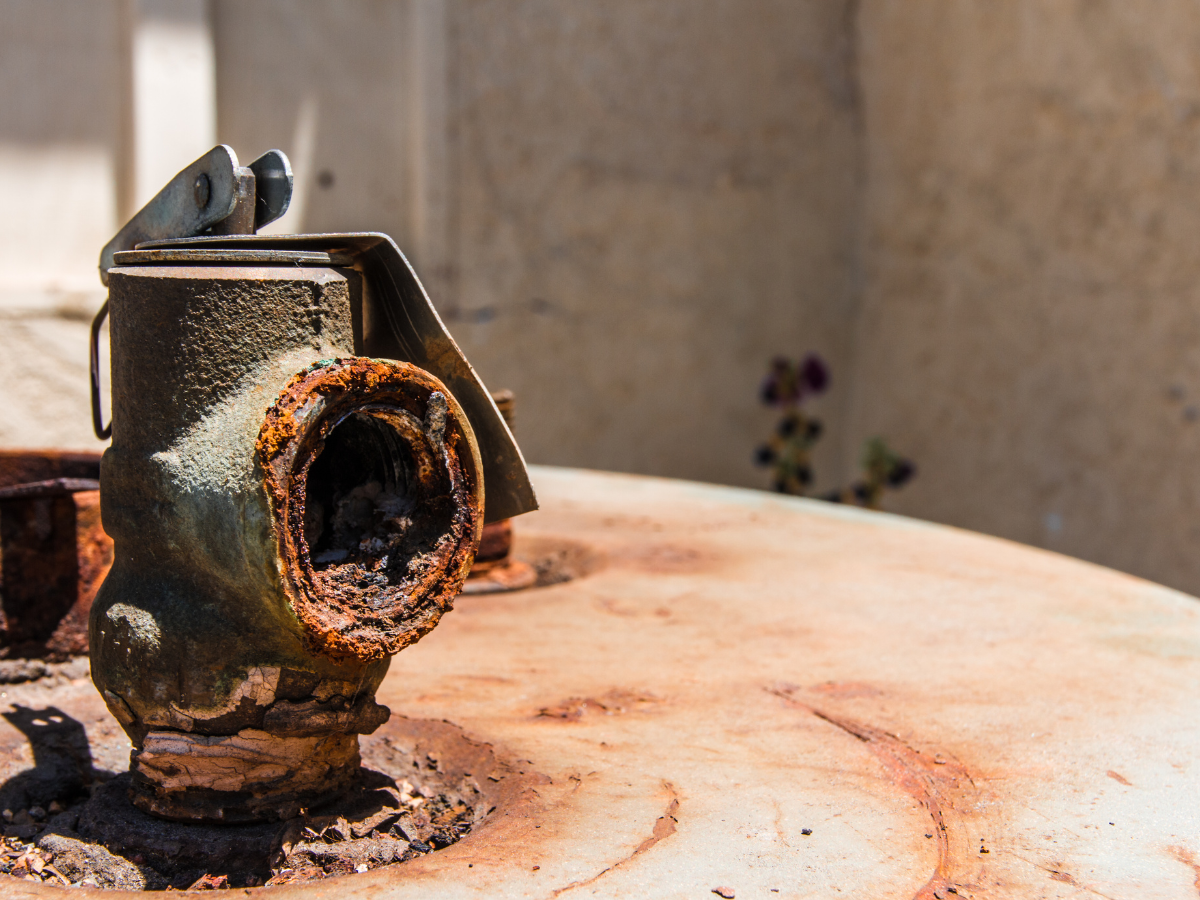
Addressing Frequent Issues with Sump Pumps

One common issue you might face with your sump pump is that it won’t switch on. In such cases, first, ensure the power supply is functioning correctly and all connections are secure. Next, inspect the float switch, which is critical in activating the pump as water levels rise. Make sure it isn’t obstructed or jammed. Finally, look at the circuit breaker dedicated to the sump pump. If it has tripped, reset it accordingly.

Another issue that users often experience is inadequate water drainage. If your sump pump isn’t effectively draining water, remove any debris, such as dirt or rocks, from the sump pump pit that could be causing a blockage. Then, adjust the float switch. Its position impacts the water level at which the pump switches on and off, hence affecting the drainage. 

Additionally, you need to make sure the pump’s size and capacity are adequate. If the sump pump is too small or can’t handle the volume of water, consider upgrading to a larger, more powerful model.

Lastly, you might find that your sump pump is continually running without switching off. In this case, first, check the switch that regulates pump operation. It might be stuck in the “on” position, causing the pump to run continuously. If your pump includes adjustable switch sensitivity settings, try modifying them to determine the suitable sensitivity level. 

Finally, check the discharge pipe’s alignment and slope. If not correctly positioned, water can flow back into the pit, which can trigger the pump to run continuously. So, ensure that the discharge pipe is appropriately aligned and angled to facilitate proper drainage.

How to Tell If Your Sump Pump Is Working Properly — Conclusion

Managing a sump pump might seem daunting, but armed with the right information and a proactive mindset, it’s an essential part of maintaining your home, especially in weather-prone areas. 

Remember, whether it’s the calm after a storm or just an ordinary day, a well-functioning sump pump can make a noticeable difference in your everyday life. If you encounter any problems or inconsistencies during your routine check, don’t hesitate to call a professional plumber or contractor.

At Full Speed Plumbing, our experts are on standby to provide you with reliable, efficient, and timely maintenance services. Save your home from potential water damage – contact one of our team members today to schedule your sump pump inspection or any plumbing needs you may have. Your peace of mind is our priority.

Essential Water Heater Safety Tips

When it comes to maintaining a comfortable and functioning home, mastering the basics of water heater safety is a must. Full Speed Plumbing is here to guide you through the journey, ensuring your house remains warm and welcoming while keeping safety at the forefront. As we delve into the essentials, we’ll explore how heat, pressure, and temperature are intertwined in your water heater’s operation. 

Today’s compilation of essential tips will equip you with the knowledge to handle your water heater with confidence, ensuring it continues to serve you seamlessly while prioritizing the safety of your household. 

Stay tuned as we turn up the heat on water heater safety!

Installation Requirements

Before you begin the water heater installation process, there are a few requirements that you need to meet, including the following:

  • Certified Technician: Trust the installation to a certified technician. They bring expertise and experience, ensuring safe and correct installation.
  • Proper Tools: Have the necessary tools handy. This might include a pipe wrench, tubing cutter, solder, and flame protection cloth. 

Location Selection

Choosing the ideal location is critical for safe water heater installation.

  • Indoor Installation: The water heater should be installed indoors in an area free from freezing temperatures.
  • Ventilation: Ensure there’s ample ventilation, which is essential for the efficient operation and safety of the water heater.

Clearances

Maintaining clearances is crucial to prevent overheating and ensure easy accessibility.

  • Space Around Heater: Maintain a clearance of at least 12 inches on all sides of the water heater for safety and ease of maintenance.
  • Close to Points of Use: While maintaining safety clearances, aim to install the heater close to points of use to minimize heat loss during transmission.

Local Building Codes and Regulations

Compliance with local codes is not just a legal obligation, but it also ensures the safety of the installation.

  • Permits: Secure the necessary permits from local authorities before starting the installation.
  • Inspections: After installation, arrange for an inspection by the local building department to confirm the setup aligns with local codes.

Remember, the specifics might vary depending on your location and the type of water heater. So, always refer to the manufacturer’s guide and consult with a local professional for accurate information.

Water Heater Safety Precautions for Homeowners

Adhering to safety precautions during the installation process is imperative to ensure the longevity of the water heater and those within the vicinity.

  • Gas Connections: If your water heater operates on gas, it’s vital to hire a certified technician to manage the gas connections. Gas leaks can have severe consequences, so it’s best to leave this to the professionals. Always make sure to turn off the gas supply during installation and service.
  • Electrical Wiring: For electric water heaters, be sure to disconnect the power supply during installation or servicing. It’s recommended to use a circuit tester to confirm that the power is off before working on the wiring. Never touch electrical wires with wet hands or in a wet environment.
  • Venting: Proper venting is critical to prevent the build-up of dangerous gasses like carbon monoxide. Always ensure that the venting system is set up correctly and vent gasses to the outside. Regularly check for any blockages or leaks in the venting system, as this could lead to gas build-up.

Remember, safety should always be the priority when installing and maintaining a water heater. If in doubt, don’t hesitate to consult with a professional plumber.

Recognizing the Dangers Linked with Water Heating Systems

After working in the plumbing industry for several years, our team is familiar with the dangers of water heating systems. Some of these dangers include:

The Silent Threat of Carbon Monoxide (CO)

Inadequately vented gas water heaters, like those installed by non-professionals, can lead to a serious hazard – carbon monoxide (CO) poisoning. CO, a lethal, odorless, and colorless gas, can induce life-threatening health conditions or even cause fatality when present in large quantities. Typical symptoms of CO poisoning comprise headaches, dizziness, and feeling nauseous. 

If you detect a potential CO leakage, evacuate the building without delay and alert emergency services.

The Issue of Water Damage and Flooding

A faulty or burst water heater can result in considerable water damage and flooding. This can compromise your home’s structural stability, instigate mold growth, and destroy personal property. The problem requires immediate attention. Discontinue the water supply, eliminate the surplus water, and get in touch with a professional from Full Speed Plumbing to repair or replace the heater.

Elements Leading to Water Heater Leaks and Floods

Numerous elements can trigger water heater leaks and floods. Common contributing factors include the age of the heater and improper installation, with high water pressure also being a significant concern. Regular inspections facilitated by Full Speed Plumbing can aid in the early detection of potential issues, allowing for efficient decision-making and problem resolution.

Proactive Steps to Minimize Risks

Several preventative strategies can aid in reducing the risks associated with water heaters and promote energy efficiency. The installation of a water heater pan is effective in catching minor leaks and condensation. 

Leak detection devices can provide early warnings of water leaks, providing you with time to discontinue the water supply and engage professional assistance from Full Speed Plumbing. Moreover, regular maintenance not only aids in hazard prevention but also enhances the energy efficiency and life expectancy of the heater.

Fire Risks

Particularly with gas models, water heaters can pose a risk of fire if not appropriately installed and maintained. Fires can be triggered by the ignition of flammable vapors near the water heater, an issue that arises if items such as gasoline, paint thinners, or cleaning chemicals are stored too close to the heater. 

To avoid such accidents, ensure the surrounding area of your water heater is clear of flammable materials and that the heater is installed and maintained by certified technicians from Full Speed Plumbing.

Essential Water Heater Safety Tips — Conclusion

Learning about the potential hazards associated with water heating systems and the measures to prevent them is paramount for your safety and well-being. 

Utilizing the right products and professional installation and maintenance services from Full Speed Plumbing can make a significant difference. Regular professional inspections ensure the detection of potential issues early on, preventing possible leaks, floods, or fires. Therefore, don’t compromise when it comes to the safety of your household. 

Reach out to Full Speed Plumbing today, and let us handle your water heating needs with expertise, efficiency, and care. Our team is just a telephone call away.

What Is A Hybrid Water Heater and How Does It Work?

Today, we’re diving into the world of hybrid water heaters. An innovative solution to meet your home’s hot water needs, hybrid water heaters are designed to offer the best of both worlds: energy efficiency and outstanding performance. 

These devices operate by seamlessly switching between heat energy sources to maintain a constant temperature, providing a steady supply of hot water while conserving energy.  

Stay with us as we unravel the technology behind hybrid water heaters and how they manage to keep your showers warm without breaking the bank.

What is a Hybrid Water Heater? — An Expert Guide for Homeowners

A hybrid water heater, also referred to as a heat pump water heater, is a device that combines two technologies to heat a building’s water. Imagine this as a tag-team effort. 

One player is the traditional electric heating element we find in most water heaters. The second player is a heat pump, a clever piece of technology that extracts heat from the air or ground, amplifies it, and uses it to heat your water. By working together, these two technologies provide a reliable and efficient source of hot water. 

What’s particularly neat about this setup is its adaptability. The heater automatically switches between the heat pump and the electric element, depending on the most energy-efficient option at any given time. This makes hybrid water heaters a fantastic option for homeowners who would like to reduce their energy bills without compromising performance.

The Heat Pump: Harnessing Existing Heat

The heat pump is an ingenious device that uses a small amount of electricity to move heat from one location (the surrounding air or ground) to another (the water in your storage tank). It doesn’t generate heat directly but works more like a refrigerator in reverse.  

When there’s enough heat in the surrounding air, the heat pump extracts this heat and transfers it into the water in the tank. This process is efficient and uses significantly less energy than traditional methods of heating water.

The Electric Heating Element: A Reliable Backup

The electric heating element steps in when the heat pump alone cannot meet the hot water demand. This could be when the air temperature drops too low for the unit to work effectively or when there’s a high demand for hot water in the house. The electric element heats the water directly, providing a reliable backup to ensure a constant hot water supply.

Together, these two components form a dynamic duo that ensures an efficient and reliable source of hot water. The hybrid water heater intelligently switches between the heat pump and the electric heating element as needed. So, you get all the hot water you need and save on your energy bills, too!

Why Should You Invest in a Hybrid Water Heater for Your House?

Investing in a hybrid water heater is a wise decision that can lead to a wide range of benefits to homeowners. 

Firstly, let’s talk about cleaning. Traditional water heaters often accumulate mineral deposits over time, leading to inefficiencies and requiring frequent maintenance. On the other hand, hybrid water heaters are less prone to these issues, reducing the need for regular cleanings by a plumber.

The energy factor is another essential aspect to consider. Hybrid water heaters excel in energy efficiency, often having an energy factor two to three times higher than traditional models. This means you’ll use less energy to heat the same amount of water, leading to significant savings on your utility bills.

The unique ability to switch between heat sources is arguably one of the key selling points of hybrid water heaters. The device intelligently switches between the heat pump and the electric heating element, depending on which source is most efficient at that time. This adaptability results in consistent hot water supply and energy conservation.

Finally, while the initial investment may be higher, the long-term savings on energy bills and the potential for lower maintenance costs make hybrid water heaters worth considering. So, next time you’re chatting with a professional plumber about water heater options, be sure to ask about the benefits of going hybrid.

What Is A Hybrid Water Heater and How Does It Work? — Conclusion

In conclusion, hybrid water heaters present an innovative solution to traditional hot water problems, merging efficiency and performance. 

They offer homeowners the best of both worlds, seamlessly switching between heat sources to conserve energy while ensuring a constant supply of hot water. Not only are they more energy-efficient, but they also require less maintenance and are adaptable to different weather conditions, which gives you even more peace of mind. 

At Full Speed Plumbing in Mount Vernon, WA, we understand the importance of having a reliable and cost-effective hot water system for your family. We’re a family-owned business that takes pride in providing professional advice and services. 

If you’re considering investing in a hybrid water heater, we’re here to help you make the best decision for your home. Check out our blog for more information on plumbing solutions, or get in touch with our professionals today for a consultation, installation, or repair. Let’s work together to ensure your family always has access to hot water without it costing the earth!

Toilet Weak Flush: Causes & Fixes

At Full Speed Plumbing, we understand the frustration that comes with a weak flushing toilet. It’s not just about the inconvenience but the potential water wastage and plumbing issues it could lead to.

Imagine you press the flusher, and instead of a swift whoosh of water clearing everything out, you’re left with a weak swirl that barely does the job. It’s enough to make you sink (pun intended!) in despair.  

But don’t worry! 

In today’s article, we’ll guide you through the possible causes and fixes for this common household annoyance. So, let’s dive right in and navigate the waters of toilet plumbing together!

Decoding the Flush System

At Full Speed Plumbing, we believe an efficient flushing system is the heart of a clean and sanitary bathroom. So, to tackle the issue of a weak flush, let’s first understand the intricacies of the flush mechanism.

The flush system comprises an assembly of components functioning in harmony to generate strong water flow. These parts include the storage tank, flapper, valve, and float:

  • The storage tank is the reservoir where water is held in readiness for the flushing process.
  • The flapper is a rubber component that lifts when the flush lever is used, permitting the water from the storage tank to rush into the toilet bowl.
  • The valve, also referred to as the flush valve or flush ball, regulates water flow and seals the tank post-flush. It ensures water is retained in the tank until the next flush is triggered.
  • The float, generally a plastic or rubber ball, controls the water level in the tank. It drops as the water level lowers during a flush, signaling the fill valve to refill the tank.

However, various issues can impede the flush mechanism and result in a weak flush. These issues could involve a deteriorated flapper, malfunctioning valve, toilet trap clog, or insufficient water level in the storage tank. Proper identification of these problems is the first step towards effective problem-solving and implementing the most suitable remedies.

Identifying the Source of Inadequate Flush Power

Navigating the complexities of an underperforming toilet flush can seem daunting, but comprehending the potential causes makes finding a solution significantly more manageable. 

Here are a few typical factors that might be weakening your flush:

  • Accumulated Minerals: Mineral deposits in the bowl or flush mechanism can gradually obstruct water flow, leading to a weakened flush.
  • Substandard Water Pressure: If your plumbing system suffers from low water pressure, this can inhibit the efficacy of your toilet’s flush.
  • Obstruction in Plumbing Vents or Waste Lines: An obstructed plumbing vent or wastewater line can compromise flush power.
  • Faulty Components: A deteriorating toilet flapper or a malfunctioning valve can impede water flow, weakening the flush.
  • Inadequately Filled Tank: A tank with insufficient water can lead to an ineffective flush.
  • Septic System Complications: Any issues with your septic system, such as blockages or backups, can severely impact your toilet’s flush capability.


A handyman acquainted with these common issues can help you pinpoint the specific cause of the weak flush. Once identified, you’ll be better equipped to use effective troubleshooting methods and determine if spare parts are needed. 

Whether the solution involves adjusting the water level in the tank, clearing blockages from the sewage line, or replacing a faulty flapper, knowing the root cause is instrumental in restoring your toilet to optimal functionality. 

In the following section, we’ll delve further into various troubleshooting methods and provide a strategy to effectively tackle these issues without having to rip up your floor!

Troubleshooting Weak Flush Issues

Dealing with a weak flush doesn’t have to be a nightmare. Here’s a step-by-step guide to help you conquer the common issues outlined above:

  • Addressing Mineral Accumulation: Use a commercial cleaner to dissolve mineral deposits. Remember to follow the instructions on the product to ensure safety and effectiveness.
  • Managing Low Water Pressure: You might need to consult a plumber to investigate if the low pressure is a house-wide issue or isolated to your toilet. They can make necessary adjustments or recommend replacements.
  • Clearing Plumbing Vents or Waste Lines: A plumbing snake can be used to clear any obstructions in the vent or waste lines. For major blockages, a professional plumber’s assistance would be advisable.
  • Replacing Faulty Toilet Components: If the toilet flapper or valve is defective, consider replacing these parts. Most hardware stores stock these items, and many include instructions for installation.
  • Adjusting the Water Level in the Tank: Check your toilet tank’s water level. If it’s too low, adjust the float to increase the water level until it’s about 1 inch below the overflow tube.
  • Addressing Septic System Issues: Problems with the septic system usually require professional help. If you suspect an issue with your septic system, contact a professional promptly.


Remember, while tackling these issues yourself can be cost-effective, there’s no substitute for professional help when needed. If you’re unsure about any step, it’s better to consult with a professional plumber to avoid further complications.

Toilet Weak Flush: Causes & Fixes — Conclusion

In conclusion, a weak toilet flush can be more than just an inconvenience; it can compromise the sanitation and efficiency of your bathroom. However, with Full Speed Plumbing’s comprehensive guide, you’re equipped to address and remedy common weak flush issues. 

Whether it’s mineral accumulation, faulty components, or septic system complications, most of these problems can be tackled efficiently with the right knowledge and tools. Nevertheless, DIY solutions, though cost-effective, have their limitations. Don’t hesitate to seek professional help from Full Speed Plumbing for more complex issues to ensure your plumbing system operates at peak performance. 

Remember, our expert maintenance services are only a call away, and our professionals are ready to assist you, ensuring your toilet functions optimally and your peace of mind is restored. 

Do you have questions about our services? Contact us today for more information, and let Full Speed Plumbing be your solution for maintaining your home’s efficiency.

Hydro Jetting vs Snaking: Which One Is The Best For You?

Are you facing a tough time with a stubborn clog in your plumbing system? 

Don’t sweat it; Full Speed Plumbing is here to guide you through it! 

We know cleaning a clogged pipe isn’t the most thrilling task on your to-do list, but we’re here to make it easier. In the world of plumbing, there are two heavy hitters when it comes to clearing clogs – hydro jetting and snaking. 

Both have their strengths, but knowing which one’s the best fit for your situation can be a game-changer. Let’s dive in and explore these two methods so you can return to free-flowing water in no time.

Exploring the Methodology of Hydro Jetting

Hydro jetting emerges as an invaluable procedure as you navigate the task of preserving a healthy plumbing system. This high-intensity water cleaning strategy refreshes your pipes, restoring them to optimal condition.

The Technicality and Procedure

Hydro jetting requires specific apparatus to execute a potent water flow, effectively eliminating persistent residues, grease, and mineral deposits from your pipes. This comprehensive cleaning process leaves no stone unturned.

The methodical approach to hydro jetting commences with examining the blockage or accumulation. Upon identification, a high-pressure water outflow is directed into the pipe, ranging between 1,500 to 4,200 PSI, providing a forceful discharge that clears all hurdles. The specialized nozzles are engineered to redistribute the water in various directions, guaranteeing a meticulous cleaning of the entire pipe interior.

Hydro jetting has become the preferred choice for large-scale obstacles and heavily soiled pipes thanks to its efficacy in removing even the most obstinate clogs.

Advantages of Hydro Jetting

Some of the advantages of hydro jetting include the following:

Thorough Cleansing

Hydro jetting outshines in eliminating debris, grease, and mineral deposits that accumulate over time. Unlike other methods, hydro jetting doesn’t just fragment the clog, it ensures a meticulous cleaning of the entire sewer pipe, reducing the likelihood of re-occurrence.

For large-scale obstacles and pipes hindered by tree roots, hydro jetting provides an inclusive solution, keeping your plumbing system unobstructed.

Flexibility and Extent

Hydro jetting is a flexible solution capable of obliterating clogs in diverse pipe sizes and materials. Irrespective of your pipe’s make—be it PVC, cast iron, or clay—hydro jetting effectively removes stubborn blockages.

Further, hydro jetting is perfect for extended pipe runs and heavy commercial applications. Its high-pressure water can infiltrate deep into the system, clearing away obstructions that would be inaccessible for other methods.

Eco-Conscious

A significant advantage of hydro jetting is its eco-friendly approach. In contrast to other drain cleaning techniques that depend on potent chemicals, hydro jetting utilizes water as its primary tool. This implies that no harmful substances are released into the environment, making it a sustainable choice for drain cleaning.

Disadvantages of Hydro Jetting

Despite hydro jetting’s efficiency, there are certain restrictions to consider. The intense water pressure used in hydro jetting could potentially inflict damage on fragile pipes or weak joints. Therefore, it’s crucial to assess the condition of your pipes before resorting to hydro jetting.

Moreover, hydro jetting may not be suitable for certain situations where high-pressure water usage is inadvisable. In such instances, other drain cleaning alternatives, such as snaking, may be more suitable.

Utilizing Drain Snakes

At Full Speed Plumbing, we deploy an array of proven solutions to deal with the common issue of drain clogs. Among these, the drain snake or drain auger stands out as a widely adopted tool. This flexible metal wire with a coiled ending, the auger, is maneuvered into the drain to disintegrate and extract obstructions.

How it Works

The process of operating a drain snake is relatively straightforward. The auger is guided into the drain until it encounters the blockage. Upon contact, the operator turns the handle, causing the auger to rotate and fragment the blockage. This rotation also ensnares any detritus, facilitating its extraction from the drain.

If you wish to utilize a drain snake to clear a blockage, here is a step-by-step guide:

  • Insert the auger gently into the drain, applying steady pressure.
  • Keep pushing the auger into the drain until you encounter resistance or obstruction.
  • Turn the handle clockwise to initiate the auger’s interaction with the obstruction.
  • Apply mild but consistent pressure while rotating the handle to disintegrate the blockage.
  • Once you’ve successfully cleared the blockage, gradually withdraw the auger from the drain, ensuring you pull out any debris in its path.
  • Properly dispose of the extracted debris to prevent future blockages.

Advantages of Using a Drain Snake

Some of the advantages of using a drain snake include:

Economic Efficiency

The drain snake offers an economical solution for residential users encountering drain blockages. The cost of procuring or renting a drain snake is typically lower than that of professional plumbing services. Furthermore, the ability to deal with minor blockages independently can lead to substantial savings over time.

DIY Compatibility

Operating a drain snake is generally straightforward, making it a viable DIY solution for clearing minor blockages. With some foundational knowledge and adherence to safety precautions, you can effectively deal with simple blockages without professional intervention. However, it’s crucial that you abide by safety guidelines and operational instructions when employing a drain snake.

Here are some safety and efficiency tips for using a drain snake:

  • Wear protective gear, like gloves and safety glasses, to prevent potential injuries.
  • Always adhere to the manufacturer’s operating instructions.
  • Begin with a manual or hand crank drain snake for more control.
  • Refrain from applying excessive force, which may potentially damage the pipes.
  • Thoroughly clean and sanitize the drain snake after each use.

Restrictions of the Drain Snake

Despite being a valuable tool for clearing blockages, the drain snake does have its limitations. One such restriction is its limited reach. The auger’s length may restrict access to blockages located deeper in the plumbing system or in difficult-to-reach areas of the pipes.

Moreover, some blockages, like heavy grease or mineral deposits, may not be effectively cleared by the drain snake alone. Such obstructions often require more formidable methods like hydro jetting to dislodge and flush them out of the system.

Hydro Jetting vs Snaking: Which One Is The Best For You? — Conclusion

Both hydro jetting and snaking have their unique advantages when it comes to dealing with stubborn drain clogs. The choice between the two will largely depend on the nature and severity of your plumbing issue. 

Remember, what works best for your neighbor might not necessarily be the best solution for you. As always, we recommend contacting a professional before making a decision. Full Speed Plumbing is always ready to assist you. 

We’re just a call away, ready to provide you with expert advice tailored to your specific circumstances. Contact us today, and let’s get your drains flowing smoothly again!

Dealing With Low Water Pressure in Your Kitchen Sink

Experiencing low water pressure in your kitchen sink can be a real dampener to your day-to-day activities. But there’s no need to worry; Full Speed Plumbing is here to guide you through this common household issue. Whether it’s washing dishes or preparing a meal, the right water pressure is crucial to make your kitchen tasks effortless. 

In this blog post, we will explore various aspects of plumbing that can affect the water pressure in your kitchen sink. 

So, sit tight and let’s dive into the world of kitchen plumbing!

What is Water Pressure and How is it Measured?

Water pressure, a commonly used term in the world of plumbing, refers to the amount of force that water exerts within your pipes. It plays a significant role in the functioning of your shower, taps, and the overall logistics of your home’s plumbing system. This force is usually measured in pounds per square inch, also known as PSI. Typical homes have a water pressure between 30 to 80 PSI.

How Does Low Water Pressure Affect Day-To-Day Life?

Low water pressure can significantly impact your day-to-day life, creating unwelcome disruptions in routine tasks. 

One of the most apparent effects is on your household hardware. Imagine the frustration of a slow-filling washing machine or a dishwasher that takes ages to complete a cycle. This inconvenience extends to your bathroom as well, with showers that trickle rather than cascade or a sink that fills at a very slow pace. 

In the basement, low pressure can affect the operation of water-dependent appliances and may even leave your laundry machine wanting more water. 

Moreover, any pipe in your home can be affected, reducing water flow. From giving your plants fresh water to washing your car, the effects of low water pressure are felt throughout your household activities, making it a critical concern requiring immediate attention.

Diagnosing the Underlying Causes of Decreasing Tap Pressure

Do you need help identifying the source of your reduced water pressure? Be sure to check out the following list of potential causes:

Obstructions and Aged Pipework

Obstructed or aged pipework, caused by debris, mineral build-ups, and rust, can significantly impact water logistics. Spotting the symptoms of obstructed or deteriorated pipework early is crucial, and problem-solving strategies may involve cleaning, repairing, or replacing your pipes.

Tap Leak

Leaks in taps can also lead to dwindling water pressure. Thus, spotting and addressing leaky taps, alongside routine tap maintenance, is highly important. 

Tap Aerator

Tap aerators, while beneficial, can cause issues if they accumulate debris. Identifying a congested or failing aerator is essential, and routine cleaning and maintenance can prevent issues from arising.

Water Supply Issues

Challenges with your water source, such as concerns with the municipal water system, can also lead to low tap pressure. Identifying signs of a community-wide low water pressure issue is necessary, and assistance from appropriate bodies may be required. Dysfunctional water pressure regulators, which are critical for maintaining consistent tap pressure, can also be a source of problems.

Incorrect Installation

Improperly installed or dysfunctional fittings can affect water pressure. Damaged pipes and incorrect pipe sizing contribute to low pressure. Ensuring proper installation and repair of fittings is necessary for optimal tap pressure.

Malfunctioning Valves

Hot/cold water blending valves regulate water temperature and pressure. However, malfunctions, clogging, or improper calibration can create challenges. Addressing these issues is vital to maintaining proper water flow.

Sediment

Sediment accumulation in the plumbing system can affect water flow and pressure. Identifying signs of sediment accumulation and using flushing or cleaning methods to remove it can help restore water pressure.

Dealing With Your Low Water Pressure

Addressing low water pressure in your home can seem like a daunting task. However, with a bit of insight and some hands-on actions, you can manage these issues effectively.

Identify the Source

Start by identifying the source of the low water pressure. This could be a result of obstructions and aged pipework, leaks, sediment accumulation, or even a malfunctioning tap aerator. Be on the lookout for signs such as slow water flow, variations in water pressure, or unusual noises in the plumbing system.

Regular Maintenance

Regular maintenance can nip potential problems in the bud. For example, a regular check on your tap for leaks, and cleaning the aerator can prevent a gradual decrease in water pressure.

Professional Assistance

In situations where the problem stems from the water supply or malfunctioning valves, professional assistance may be essential. A certified plumber or a representative from your local water authority can help identify and rectify issues linked to the municipal water system or faulty valves.

Appropriate Installation and Repairs

Finally, ensure that your fittings, including pipes and valves, are correctly installed. Any damaged pipe or incorrect pipe sizing can contribute to low tap pressure. Hiring a professional plumber for installation or repairs can ensure optimal performance.

By understanding and addressing these potential issues, you can improve the water pressure in your living space and enjoy a more efficient and satisfying use of your taps.

Dealing With Low Water Pressure in Your Kitchen Sink — Conclusion

In conclusion, tackling low water pressure in your household requires a keen understanding of the common culprits, from obstructions and aged pipework to improperly installed fixtures. 

With this guide, you are well-equipped to handle the basic DIY inspection and maintenance required to keep your water system running at full speed. However, some situations, especially those involving the main water supply or malfunctioning valves, call for professional expertise.

If the clog seems too stubborn to handle, it’s time to pick up your telephone and call Full Speed Plumbing in Mount Vernon, WA. Our team of certified professionals is ready to conduct a thorough inspection of your plumbing system and provide swift solutions that restore your water pressure. 

Letting a leaky tap or a blocked aerator take the joy out of your everyday water usage doesn’t make sense. From fixture installations to pipe repairs, we’ve got you covered. Call Full Speed Plumbing today and experience the difference in your water pressure and flow.

How to Make Your Stinky Sink Drain Smell Better

It’s a common household issue we’ve all been through – a stinky sink drain. Though seemingly trivial, maintaining a fresh-smelling sink drain is a significant aspect of a clean and healthy home environment. This unpleasant smell can be an unwelcome visitor whenever you wash dishes, brush your teeth, or simply walk by. 

But not to worry! 

In this blog post, we’ll guide you through some simple and effective steps to banish that foul odor and keep your sink drain smelling fresh. This way, you can ensure your kitchen or bathroom remains a pleasant space for you and your family. 

So, let’s dive right in!

Why Does Your Sink Drain Smell Bad? 4 Potential Causes and Solutions

There are several potential reasons why your sink drain smells off-putting. That being said, some reasons are more common than others. Some of the most common factors include:

  1. Rotten Egg Smell: This pungent odor is often caused by the presence of an excessive amount of hydrogen sulfide gas in your sink drain. This gas is produced by bacteria that feed on food debris and other organic matter in your drain. Regularly cleaning your drain with a mild cleaning solution can help prevent this buildup.
  2. Sewage Smell: If your sink smells like sewage, there might be a problem with your plumbing’s venting system. The venting system is designed to carry sewer gasses out of your home, but if it’s blocked, these gasses can seep back into your rooms. In this case, you might need to call a professional plumber to rectify this issue.
  3. Musty Smell: This mildew-like odor often indicates mold or mildew growth. If your sink doesn’t get used frequently, water can sit in the drain trap for extended periods, and when combined with warm, humid conditions, it creates an ideal environment for mold and mildew to thrive.
  4. Rancid Smell: This putrid smell usually results from rotting food particles stuck in the drain. Over time, these particles decompose and produce a foul odor. Regularly rinsing your drain with hot water can help to break down and wash away these particles.

Remember, a stinky sink drain is not just an inconvenience but can also be a sign of a more serious issue. Regular cleaning and drain maintenance can help keep these odors at bay. However, if the smell persists, it might be best to consult with a professional.

Preventive Measures for a Fresh-Smelling Sink Drain

Do you want to keep your sink drain fresh for the foreseeable future? Give these preventative maintenance tips a try:

Pouring Grease or Oil Down the Sink

It may seem harmless, but pouring grease or oil down your sink can lead to serious issues. These substances can harden and stick to the inside of your pipes, causing blockages and unpleasant odors. Instead, consider disposing of oil and grease in a sealed container in the trash.

Disposing of Food Waste Improperly

Small food scraps might slip through, but avoid rinsing food into your sink drain. Certain food items, like coffee grounds and eggshells, can stick to your pipes and create clogs. Moreover, food waste in the sink drain can decompose and smell foul. Remember to scrape plates into the trash or compost bin before washing them.

Neglecting Regular Cleaning

Just like any other part of your home, your sink drain needs regular cleaning. A simple weekly rinse with hot water and soap can go a long way in preventing odor buildup. Consider using a simple mixture of baking soda and vinegar (once per month) for a deeper clean.

Remember, prevention is better than cure. Avoiding these practices can keep your sink drain smelling fresh and functioning well. However, if you notice persistent odors despite these measures, it might be time to call in a professional plumber.

Utilizing a Drain Screen: Your Sink’s Best Friend

If you want to do your part in keeping your kitchen sink looking its best, purchasing a drain screen should be considered.

Drain screens are one of the best tools to combat foul odors and blockages in sink drains, so every homeowner should own at least one. Here’s why:

A drain screen serves as a physical barrier, efficiently trapping food scraps, hair, or other debris that might otherwise go down your sink drain. By placing one over it, these items won’t cling onto pipes inside and decompose and produce unpleasant odors – saving time and money!

Drain screens can significantly decrease the chances of clogs and blockages in your pipes, keeping water flowing freely through and improving your plumbing system’s overall efficiency and lifespan.

Installing a drain screen is a straightforward process. Simply purchase one that matches the size of your sink drain, lift off its stopper and secure the screen over it before replacing its stopper – easy!

Ensure the drain screen gets cleaned regularly to maintain its effectiveness. A quick rinse under running water should suffice, though if gunk accumulates, a soft brush and dish soap may help eliminate any buildup.

Integrating drain screens into your sink maintenance regimen will create a cleaner environment and a smoother plumbing system. It will also leave a fresh-smelling sink and plumbing system. Their simple solutions may often prove most effective.

How to Make Your Stinky Sink Drain Smell Better — Conclusion

A stinky sink drain is an all too familiar household problem that can be addressed with proper cleaning practices and preventive measures.

Knowing the potential causes and preventive strategies (like not discarding grease or food leftovers into the sink) are keys to effectively combating drain odors. Installing a drain screen provides additional benefits; this catches any items clogging the pipes while decreasing unpleasant odors. As always, professional assistance from Full Speed Plumbing will guarantee an uncontaminated and fresh-smelling kitchen sink!

Just as leftover food can clog your drain, failing to maintain proper cleanliness of your sink drain can create long-term issues. So let us help keep your kitchen sink sparkling clean, fresh, and running smoothly!

Should You Be Concerned About Rust In Your Water Heater?

Rust: it’s more than just a cosmetic problem. Particularly when it involves your hot water heater, it can signify deeper issues that shouldn’t be ignored. But should you be concerned if you spot rust on or in your tank? What does it mean if your hot water takes on a rusty hue? 

These are questions many homeowners grapple with. Rust can corrode the essential components of your water heater, potentially leading to leaks and a significant reduction in the efficiency of your unit. Through regular maintenance and vigilance, however, you can mitigate these problems and ensure the longevity of your water heater. 

In today’s blog post, we’ll delve into this issue in more detail, helping you understand when rusty signs should be a cause for concern.

5 Common Safety Concerns Related to Rust in Water Heaters

If your water heater is getting rusty, you may wonder if it poses a risk to your (or your family’s) safety. Although they aren’t life-threatening, rusty water heater units can lead to several potential issues, some of which include:

  1. Leakage: Rust can indicate that your water heater’s metal has begun corroding, leading to corrosion-induced holes or cracks in its tank, which could allow leakage into your property and waste of precious water resources. This leakage could cost you and your property money in lost resources and additional property damages.
  2. Reduced Efficiency: Rust and sediment build-up within your water heater can impair its ability to heat water efficiently, forcing the heater to work harder to supply hot water, resulting in higher energy usage and utility bills.
  3. Contaminated Water:  Rust in your water heater can produce brownish-red water with an unpleasant taste and odor that is unsuitable for consumption or use, even though this is generally safe to do. While not harmful in terms of health effects, rust in your water may compromise taste and smell and make drinking or using your water an unpleasant experience.
  4. Lifespan: Rust can significantly reduce the lifespan of a water heater, shortening its expected lifespan significantly and forcing you to replace it sooner than planned, at potentially substantial expense. Therefore, prompt action must be taken if rust becomes an issue to address its effects immediately and protect all components against further deterioration.
  5. Potential Health Effects: Although rare, drinking or cooking with rusty water could lead to health concerns for people with compromised immune systems. If concerned, consult with healthcare providers immediately if any adverse health reactions appear with its use.

Ensuring Safety Through Regular Maintenance and Inspections

Homeowners can significantly reduce the risk of rust in their water heaters by implementing a routine maintenance schedule with a professional plumbing service. Regular maintenance checks are crucial in identifying early signs of rusting and mitigating potential damage. 

Here’s how it works:

  1. Rust Detection: Plumbers are skilled at detecting rust in water heaters, even in the early stages. They can thoroughly inspect your unit for any signs of rust or corrosion. Quick detection means you can address the problem before it escalates, preventing leaks and efficiency issues.
  2. Leak Prevention: Regular maintenance involves checking for leaks and cracks resulting from rust and corrosion. By promptly identifying and fixing these issues, you can prevent water wastage and potential water damage to your property.
  3. Cleaning and Flushing: Part of the maintenance service includes cleaning your water heater and flushing out any sediment build-up. This process helps remove existing rust and prevents further accumulation, ensuring your water remains clean and clear.
  4. Long-term Protection: A professional plumbing service can provide advice and solutions for long-term rust prevention. This could include installing a water softening system if your water supply is high in minerals, which can contribute to rust.

Remember, the key to maintaining your water heater’s longevity, efficiency, and safety lies in regular maintenance. Don’t ignore those subtle signs of rust—get ahead of the problem with the help of an experienced plumbing service.

Handling a Rusted Water Heater: Removal and Disposal Tips

Dealing with a rusted water heater can be challenging, but handling this with caution is critical to avoid potential injuries or damage to your property. 

Here are some helpful tips for safely handling the removal and disposal of a rusted water heater:

  1. Safety First: Before you begin, always remember to switch off the energy supply to the water heater. If it’s a gas heater, turn off the gas supply. Doing this will prevent any accidental ignition or electrical issues.
  2. Drain The Tank: Using a garden hose, connect it to the tank’s drain valve. Run the other end outside to a location where it’s safe to discharge the hot, rusty water. Open the drain valve and allow the water to flow out of the tank.
  3. Disconnect The Unit: Once the tank is empty, disconnect the water lines using a pipe wrench. If your heater is gas-powered, disconnect the gas line. Remember to cap the gas line once it’s disconnected to prevent any leakage.
  4. Removal: With the help of another person, carefully lift the water heater out of its position. Use a dolly or hand truck to transport it to avoid straining your back.
  5. Disposal: Contact your local waste disposal service to understand the regulations in your area for disposing of old water heaters. Some areas may require specific disposal or recycling processes.
  6. Safety Gear: Throughout the process, remember to wear appropriate safety gear, including gloves and eye protection, to shield yourself from sharp edges and rust particles.

Please note that if you’re unsure about any step, hiring a professional plumber knowledgeable about these processes is always safer. They can properly and safely handle the removal and disposal, preventing potential harm to you or your property.

Should You Be Concerned About Rust In Your Water Heater? — Conclusion

In conclusion, the presence of rust in your water heater should not be taken lightly, as it can lead to numerous safety concerns, reduced efficiency, and potential health issues. Proactive care, regular maintenance, and timely inspections are the best ways to prevent rust from developing in your water heater. It not only elongates the lifespan of your unit but also ensures your peace of mind knowing your water is safe and clean. 

If you’re looking for a professional, reliable plumbing service, Full Speed Plumbing is your answer. Don’t wait for the rust to reach a critical level. Stay a step ahead with the help of Full Speed Plumbing. 

Contact us today to speak with one of our technicians and keep rust at bay.

6 Steps On How to Fix A Gas Line Leak

Encountering a gas line leak in your home can be a daunting situation. Not only does it pose a potential fire risk, but it’s also hazardous to your health due to the toxic fumes. Recognizing the importance of addressing gas line leaks promptly and correctly, we’ve compiled an easy-to-follow guide to tackle this issue. 

We’ll walk you through the necessary steps on how to fix a gas line leak, ensuring you’re well-equipped to deal with such a situation. However, if you feel even a shred of doubt, don’t hesitate to seek professional help. 

Full Speed Plumbing is always ready to assist you. After all, your safety is our priority. Stay tuned; we’re about to get started!

Understanding Gas Line Leaks

Gas line leaks can be an emergency in any home’s plumbing system. A gas leak occurs when natural or propane gas escapes from its pipes into areas it shouldn’t. This may happen for various reasons, such as corrosion-filled pipes, improper connections, or accidental damage.

These leaks can be particularly hazardous as gas is highly combustible and may spark fires or explosions when in contact with sparks or open flames, as well as having long-term health implications from inhaling this harmful gas over an extended period.

Given these potential dangers, detecting and addressing gas line leaks is imperative as quickly as possible.

Possible Causes of Gas Line Leaks

There are several reasons why a gas line leak might occur in your home. Understanding these causes can help in early detection and prevention. Here are the most common culprits:

  • Corroded Pipes: Over time, gas pipes may become compromised due to environmental influences, poor maintenance practices or simply their age. Corrosion weakens them further and makes them more prone to leakage.
  • Unsecured Connections: Unfortunately, not all gas pipe installations are done perfectly, and improper fitting may result in gas escaping through loose connections and into the atmosphere.
  • Accidental Damage: Accidents like construction work, landscaping work, or home renovations may accidentally damage gas pipes, causing leakage. 
  • Natural Disasters: Events such as earthquakes or heavy storms may dislocate gas lines, leading to leakage issues.
  • Poor-Quality Pipes: Low-quality gas pipes increase the risk of leaks due to the inability to withstand constant pressure, cracking, or breaking over time.

Remember, gas line leaks pose serious threats to both you and your home. If you detect a gas leak, immediately evacuate the area and contact professional assistance directly.

Fixing a Gas Line Leak: 6 Essential Steps

If you’ve identified a gas line leak in your home, here’s a step-by-step guide to help you fix it. However, if you’re not confident in your abilities, calling a professional service provider, like Full Speed Plumbing, is always safer.

Step #1 — Turn Off the Gas Supply

The very first step is to turn off the gas supply. Locate your gas meter and turn the valve to the ‘off’ position. This will stop any further leakage and minimize the risk of fire.

Step #2 — Ventilate the Area

Open all windows and doors in your home to allow fresh air circulation. This step will help dilute the gas concentration, reducing inhalation risks and fire.

Step #3 — Identify the Leak

With the gas off, you can now try to identify the source of the leak. Apply a mixture of dish soap and water to the gas pipes. If bubbles form, you’ve found the leak.

Step #4 — Apply Epoxy

Once you’ve located the leak, clean the area around it and apply a thick layer of epoxy putty on it. Make sure the putty covers a large area around the leak for a secure seal.

Step #5 —Check for Additional Leaks

After fixing the initial leak, inspect the entire gas line for any additional leaks. Repeat steps 3 and 4 if necessary.

Step #6 — Test the Fix

Once all leaks have been sealed off, switch on your gas supply again and inspect where you applied epoxy. If no new bubbles form after applying it, the leak has likely been successfully addressed.

Remember that handling a gas line leak safely is often a complex and risky undertaking. If you feel uncertain about your ability to handle this situation on your own safely, contact a professional plumber, as your safety should always come first.

The Importance of Post-Repair Maintenance and Inspection for Gas Lines

Once your gas line leak has been repaired, it’s crucial not to become complacent. Scheduling regular post-repair maintenance calls with a professional is a judicious step for every homeowner. 

Doing this allows for constant monitoring of your gas pipes, ensuring that they remain in optimal condition and reducing the risk of future leaks. These maintenance calls can identify minor issues before they escalate, saving you from potential danger and costly repair jobs. 

Ultimately, entrusting this task to a professional adds an extra layer of safety to your home, granting you peace of mind. It ensures that the repair job has been effective and minimizes the chances of experiencing similar issues down the line.

6 Steps On How to Fix A Gas Line Leak — Conclusion

Gas leaks in your home are a serious risk that should be addressed promptly and decisively. They could result from corrosion-encrusted pipes, improperly fitted connections, accidental damage caused by natural disasters, or poor-quality pipes; whatever their source, gas leaks should always be treated as urgent matters that need urgent action to address them and ensure your family’s safety. 

Therefore, taking swift and appropriate steps to address and resolve them is imperative in protecting your and your family’s well-being.

But if ever in doubt, don’t hesitate to seek professional assistance from Full Speed Plumbing. Our top-tier service for fitting and repairing gas lines ensures your home remains safe and efficient; don’t take chances with gas leaks–trust only the best in business!

Full Speed Plumbing’s talented team members can help ensure a worry-free future. Contact us today.


4 Ways to Make Your Tap Water Taste Better

We’ve all been there – you fill your glass with tap water, take a sip, and the taste doesn’t hit the mark. 

Well, worry no more! We’re here to help you transform your regular tap water into a delightful thirst quencher. After all, staying hydrated shouldn’t feel like a chore. It’s important to remember that enjoying the taste of tap water significantly adds to your daily hydration routine. It not only quenches your thirst but also contributes to your overall well-being. 

And who better to guide you in your hydration journey than your reliable partner, Full Speed Plumbing

So, let’s dive right into the simple yet effective ways to enhance the flavor of your tap water. Stick around to the end for more helpful tips from Full Speed Plumbing. Let’s make every sip count!

The Basics of Tap Water

Before we explore how to improve the taste of tap water, let’s first understand its composition. Tap water is composed primarily of H2O but may contain minerals like calcium, magnesium, and potassium, which contribute a unique taste profile for each region’s tap water supply. You may even detect some chlorine due to water disinfection processes in certain locations.

The Health Significance of Tap Water

Tap water is more than just a thirst quencher. It plays a critical role in our overall health. Regular water consumption aids digestion, enhances skin health, regulates body temperature, and even boosts brain function. The minerals present in tap water can contribute to your daily nutrient requirements, supporting bone health, cardiovascular function, and more. 

Improve the Taste of Your Tap Water with These Nifty Tips

Tired of drinking the same old tap water? You can drastically improve the flavor by using these tips:

#1 — Activated Carbon Filters

First up on our list is the widely popular Activated Carbon Filters. These filters work wonders in improving the taste and odor of your tap water. They function by attracting and absorbing impurities from the water, thanks to their porous nature. 

Doing this effectively eliminates chlorine, sediment, volatile organic compounds (VOCs), and certain parasites from your tap water and makes it taste better overall! Remember, it’s all about improving its flavor!

#2 — Reverse Osmosis Filters

Reverse Osmosis Filters provide another method of water purification that stands out, known for removing more contaminants than any other filter available today.

Reverse Osmosis filters water through a semipermeable membrane, effectively trapping and filtering out impurities like fluoride, lead, pesticides, and more to improve its flavor and overall taste. Reverse Osmosis can drastically enhance tap water by filtering out contaminants like fluoride, lead, and pesticides from your drinking supply.

#3 — UV Filters

UV Filters have emerged as an innovative solution for water treatment. This technology uses ultraviolet light to kill harmful pathogens such as bacteria and viruses in your water without altering its flavor, taste, or color – an attractive feature if your priority is eliminating microbial contamination rather than aesthetic concerns.

Contact an experienced plumber, like one of our team members at Full Speed Plumbing, to learn more about the benefits of UV filters.

#4 — Infuse Your Tap Water for a Natural Flavor Boost

In addition to filters, infusion is another fantastic way to enhance your tap water’s taste. Infusing your tap water with fruits, herbs, or even spices improves the flavor and adds a dose of natural nutrients. You get a refreshing drink that’s a delight to your taste buds and a source of antioxidants, vitamins, and other beneficial compounds straight from nature’s pantry. 

Here are some popular flavor combinations to try if you’re into experimenting with flavor chemistry:

  • Lemon and Mint
  • Cucumber and Basil
  • Strawberry and Kiwi
  • Ginger and Orange

With these natural infusions, your tap water becomes much more than just hydration—it’s a healthful, flavorful experience.

Storing Tap Water for Enhanced Taste and Odor

For a noticeable improvement in the taste and odor of your tap water, consider storing it in glass containers. This simple yet effective method works because glass is a neutral material that does not transfer any odor or taste into the water. 

The Risks of Storing Tap Water in Plastic or Metal Containers

While plastic and metal containers may be readily available and convenient, they may not be the best options for storing your tap water.

  • Plastic containers can transfer chemicals like BPA into the water over time, especially when exposed to heat. This not only affects the taste and smell of the water but may also pose potential health risks.
  • Metal containers can also alter the taste of your water, giving it a metallic hint. Moreover, specific metal containers may rust over time, releasing substances into the water that could affect the safety and taste.

All in all, to enjoy the best taste of your tap water, opt for glass containers for storage, and always prioritize cleanliness and the right storage conditions.

4 Ways to Make Your Tap Water Taste Better — Conclusion

Tap water offers more than meets the eye. Not only is it an essential hydration source, but it can lead to healthier lifestyle choices when taken and treated correctly.

Filtrate it or add natural flavoring, there are numerous strategies available to you for improving the taste and quality of tap water.

Be sure to store it properly, ideally in glass containers, to maintain freshness and taste. By following these tips and strategies, ordinary tap water can become a delicious beverage that supports overall well-being.

Have a plumbing emergency?
Let Full Speed Solve Your Plumbing Woes

We're all revved up to serve you. To get started, give us a call at or request service online today.

Wrench

Contact Information

Local Office

17675 Washington 536
Mount Vernon, WA 98273
Full Speed Plumbing

Full Speed Plumbing's mission is to forge ahead full speed when answering the call of our customers. The service we offer is quick and empathetic as our team provides options and education.


© Full Speed Plumbing | All Rights Reserved. (360) 680-1264

Request Service